Classic Bircher Müsli Recipe -“grab and go breakfast”

Classic Bircher Müsli Recipe -Truefoodsblog View Post

Classic Bircher Müsli Recipe -” grab and go breakfast”

Classic Bircher Müsli Recipe – its finally there- the summer time and we are leaving the dutch border behind us .Moritz flight to the Gili islands is going in one day and I have two hours left to pack my stuff to head to Berlin. The Truefoodsteam is always restless 😛 Especially the last two days were full of rushing, because we had to move all our stuff from the house. This left us little time to celebrate our holy breakfast like ever :/

That was the perfect occasion to make a classic Bircher Müsli the night before and i also decided to make a photo and share that recipe with you !just because it really saved our life that morning.

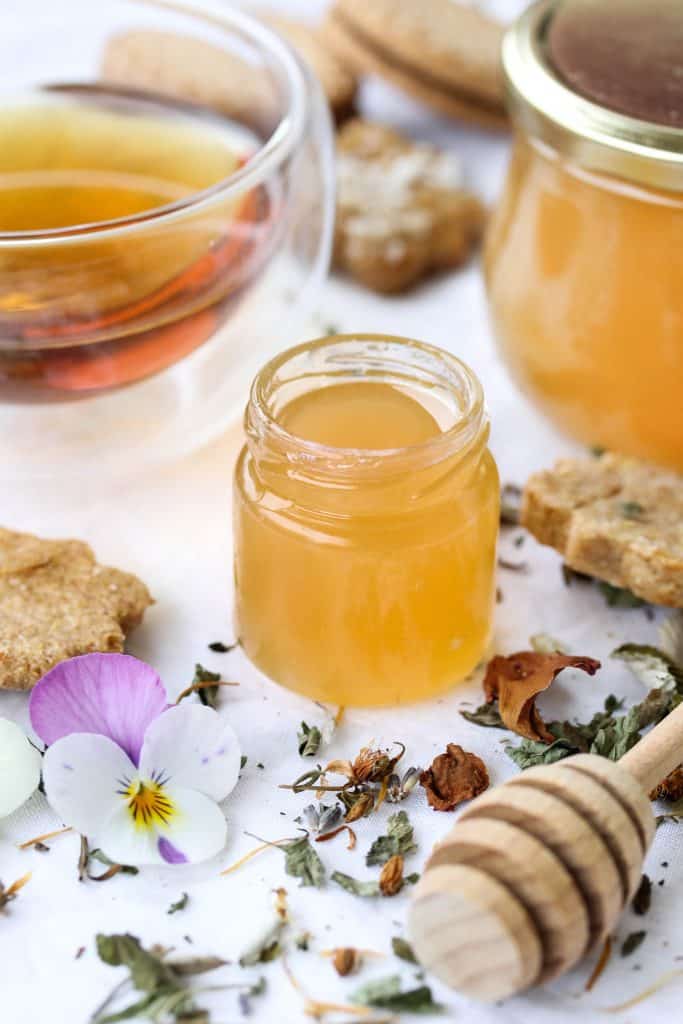
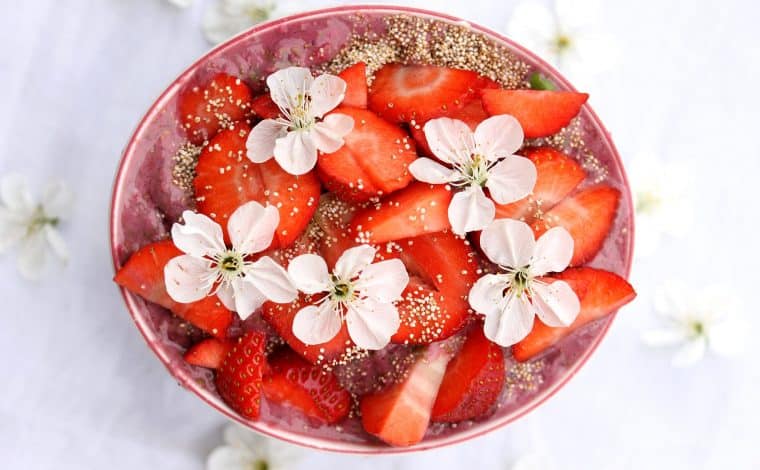
You basically prepare it in the evening and just top it of with some more yoghurt, fruits, nuts or even a sprinkle of honey and you can just take the glass whereever you go. Its easy to eat and it gives you energy to manage your morning. Many people mostly know Bircher Müsli under the name “overnight oats” but this is the classic Bircher Müsli Recipe like Moritz teached me 🙂

Enjoy and dont stress yourself 🙂

Classic Bircher Müsli Recipe -Truefoodsblog

Classic Bircher Müsli Recipe -Truefoodsblog

How you do it:

Overnight oats – Bircher Müsli – so prepare it the night before you want to eat it for breakfast or as a on the run snack

  1. In a bowl, add the oats, the yoghurt, quark, nuts and the cutted dried fruits of choice and give it  a good stir.
  2. add some more milk until it gets a smooth and slightly liquid texture, this is because the dried fruits, nuts and oats will soak in the liquid leaving a smooth, moist Bircher Müsli in the morning.
  3. the next day, take our your bircher müsli, give it  a stir and maybe add some more milk if it is too stiff
  4. top it with some more yoghurt and add your favourite toppings 🙂

Ready to eat :)))

[amd-zlrecipe-recipe:8]

Vegetable Baked Pakoras – “Indian must have” with spicy papaya chutney

Vegetable Baked Pakoras-Truefoodsblog View Post

Vegetable Baked Pakoras – “Indian must have” with spicy papaya chutney


Vegetable Baked Pakoras  – Quick and easy. Okay Indian food is definitely one of my favourite comfort foods! Last week we already posted a recipe for my all time classic- Daal. Naan and Raita, as well as the Papaya Chutney, are all already on the blog. Soon there will be no excuse to be able to cook a whole indian feast anymore 😉

That was exactly what we did last night. It is just too good, although the whole house, as well as our hair and skin, was smelling like indian spices the whole day. Pakoras are definitely a must have when it comes to a proper Indian feast. They come in all different types like with potatoes, eggplant, paneer or any other kind of vegetabels. The amazing thing about pakoras is the spicy mostly fried chickpea dough covering something that will basically melt down in your mouth! Its just beautiful:)

I am very excited to make paneer (Indian homemade cheese) from fresh whole fat milk from a farmer as soon as I am back in Germany again. But for now: Enjoy this baked pakoras recipe.

Vegetable Baked Pakoras - Truefoodsblog

Vegetable Baked Pakoras – Truefoodsblog

How You do it:

  1. Preheat the oven to around 200°
  2. Wash your cauliflower and the zucchini and try it properly
  3. Cut the zucchini into half a fingernail thin slices (one of those strange descriptions again)
  4. Break the cauliflower into the little roses, leave the really small ones and cut the bigger roses into the same slices as the zucchini
  5. Meanwhile, mix the batter by adding the egg or 2 tbsp water and 1 tbsp soaked flaxseed (flaxseed egg) , chickpea flour, milk, baking powder, turmeric, coriander, curry, salt and cumin. Mix the batter until you receive a smooth texture. Add more flour or water if necessary.
  6. Start with covering the zucchini and the cauliflower evenly with the batter. They should be fully covered but not trip the batter.
  7. Heat coconut oil in the fryer (we are using the Tefal fryer from the following link because this one is frying perfectly crispy with only 3 % Fat used) Get yourself the with our This Link:  TEFAL Actifry with 50 % Truefoodsblog Discount on the Product now!
    Fry the with Dough covered Pakoras until golden and crusty.
  8. Alternatively, Place them on a baking sheet and let them bake for around 20 min until they start to get golden brown.

Let them cool slightly and serve it either as a snack or a side dish to a big beuatiful indian feast. We served it with some selfmade Papaya chutney and raita and it was simply delicious !

Find the recipe :https://www.truefoodsblog.com/recipe/papaya-chutney/

Vegetable Baked Pakoras-Truefoodsblog

Vegetable Baked Pakoras-Truefoodsblog


Enjoy 🙂

Vegan Tacos – with Mango Salsa, Pumkin Seeds Cream & marinated Tofu

Vegan Tacos- Truefoodsblog View Post

Vegan Tacos with Mango Salsa, Pumkin Seeds Cream & marinated Tofu

Vegan Tacos :  so its the last days before the summer break and te exams ae finally done. Tonight will be the final dinner for us together as roommates with Fi, before we head back to Germany and move to another appartment again. Moritz brought a big bag of rescued red bell peppers and we are going to see what we cook with it.

Of course we also need to take care of our little garden now ! unfortuatly we can not bring them home so every plant needs a place to stay or be harvested. In the next days we are going to harvest the beautiful little Red Beets as well as the baby turnips and the cappage leaves. Still wonder what we can cook with the cabbage though!

Anyways, this also inspired me to use the mint, the salad leaves and the arugula for this beautiful little recipe. We also had a really nice and jucy mango from the farmers market so I thought why not try something new:)Furthermore, we had some really nice plane taifun tofu which I marinaded.


Vegan Tacos - Truefoodsblog

Vegan Tacos – Truefoodsblog


How you do it :

Tacos:

  1. Heat a pan on medium heat
  2. Add the Wraps until they blow up and get golden.
  3. Hang them over the edge of for example the edge of your table and let it cool down so it gets the taco shape.

Marinated Tofu

  1. Start with draining the tofu and cut it into thin slices
  2. In a bowl, mix the agave sirup, soy sauce, ginger, sesame oil, tumeric and curry powder together
  3. Let the tofu soak in it while you preapare the salsa

Mango – Salsa

  1. Cut the mango into small cubes (here is a link how to cut a mango: http://www.thekitchn.com/how-to-cut-a-mango-cooking-lessons-from-the-kitchn-166290)
  2. Cut the cucumber in the same size as the mango and add both in a small bowl
  3. Add the lime, mint, salt, pepper, spring onions and olive oil and give it a good stir.


  • meanwhile start with heating a pan on medium heat and add the tofu to to it (set the remaining marinade aside to use it later. When the tofu starts getting golden on both sides add the rest of the marinade and let it reduce into the tofu.

Pumkin Seed Cream

  1. Add the pumkin Seed paste & oil, oghurt, apple cider vinegar, salt, lemon cest and the chilli powder together in a bowl.
  2. stir until it gets a smooth texture.
  3. cut the tomatoes into small slices and serve as well with the lettuce

Place everything on the table and let the feast begin :)))

[amd-zlrecipe-recipe:13]

Red Beet Carpaccio – “starter kit “, classy, fast and easy

Red Beet Carpaccio - Truefoodsblog View Post

Red Beet Carpaccio – “starter kit” Classy, fast and easy

Red Beet Carpaccio – The vegetarian equivalence to a standard meat carpaccio. Sweet elderflower syrup or jam meets warm nuts, fresh thyme & cottage cheese on a layer of thinly sliced carpaccio- if that doesn’t sound like something professional :P. I think it was new years eve when we had this starter for the first time and it instantly won my heart.

The only tricky thing but most crucial about this recipe is to cut the beet as thin as possible.It just requires a little bit of patience, a good knife and practice. The nice thing is that the beet is very smooth, so it should not be too difficult.

For me personally, this is something that I prefer to make for a dinner for two, when you really want to treat yourself and cook a bit more – festive or to celebrate something. So what did we had to celebrate? Moritz won the table tennis match and the price was a “luxury evening” :D.

Hope you enjoy this starter and celebrate something or just yourself 😉


Red Beet Carpaccio - Truefoodsblog

Red Beet Carpaccio – Truefoodsblog

How you do it:

  1. Take some nuts and grind them roughly, so some crumbles remain.
  2. Heat a pan on medium heat and add the nuts (pay close attention so they do not burn). tehy are done when they start to release a beautiful scent and turn golden brown (take them out of the pan, otherwise they roast even further).
  3. Meanwhile, drain the beet (the red juice colours everything really purple, so maybe you can include that in the main dish or even dessert), and start cutting really thin slices with a good knife. The slices should almost be transparent, believe me the effort is worth it.
  4. Add the elderflower jam into a small bowl and mix it with the salt, oil and vinegar. Mix it with a folk until it gets really really smooth.
  5. Place the beet on your favourite plate so the beet is halfway overlapping each other.
  6. With a spoon, softly brush on the jam mixture and finish up with adding 4 scoops of cottage cheese, the nuts and the thyme

Serve with some warm chiabatta for good ;))

Enjoy!!!


Easy Burrata Recipe with Italian Pasta Sauce “á la Mama”

Easy Burrata Recipe -Truefoodsblog View Post

Easy Burrata Recipe with Italian Pasta Sauce “á la Mama”

Easy Burrata Recipe with Italian Pasta Sauce “á la mama “: After a long time without my beloved Burrata Cheese, I finally found a small cheese store in Amsterdam South with a variety of special Italian cheese. I have been a huge fan of this product since i tried it so I bought one of this incredible pieces of cheese art. I planned it to add it to the famous Pasta sauce which I got thought  at one of my vacations in Southern Italy from Federica, an elderly women I got to know in Milan. This Pasta sauce will give you the feeling of beeing directly transferred to the Mediterranean ocean coasts of beautiful Italy ( In my perception they have the best food worldwide).

A little hint if you are not sure what should be the difference between Burrata and Mozzarella cheese. Fresh mozzarella cheese is a semi-soft Italian cheese made from cow or water buffalo milk. Burrata cheese takes the mozzarella one step further — it’s mozzarella that’s formed into a pouch and then filled with soft, stringy curd and cream.

I like to share with you this incredible Vegetarian Pasta recipe and hope you love it such as we do 🙂


Easy Burrata Recipe -Truefoodsblog

Easy Burrata Recipe -Truefoodsblog

How you do it:

  1. Start with peeling your onions, garlic and cut them into fine cubes. Peel the carrot and cut it with the Zucchini in brunoise (small cubes). The dried tomatoes and the olives in thin slices.
  2. Heat some olive oil in a saucepan and add the onions and garlic, stirring occasionally and steam them until they become glazed. Cut the Herbs fine and add them to the pot, short after that add the tomato puree and steam till everything is mixed well. Now deglaze with the red wine, cook for 2 more minutes and then fill up with the canned tomato cubes and the vegetable stock.
  3. Put the saucepan with the tomato sauce on a very gentle heat, with a lid (otherwise the tomato sauce will split and the whole kitchen will be covered in it! Stirring occasionally and let it cook for 5 minutes. Add the carrot, zucchini, dried tomatoes and the olives and let it cook for 15 more minutes.
  4. Fill a large saucepan with water, up to about ¾ full. Add some salt (about half a teaspoonful).
    Put the pan on full heat and cover it with a lid. The water has to be boiling hard
  5. Add your chosen amount of Wholegrain pasta and cook it for around 8-12 minutes until al dente.
    You should stay in the kitchen to stir it from time to time, say every 3 minutes
  6. When the pasta is cooked, pour the penne carefully into the colander. Then
    pour it back into the pan and add some olive oil (prevents the pasta from sticking together).
  7. Turn off the heat from the tomato sauce and add the honey. Add some salt and pepper at pleasure and taste taste taste 🙂
  8. Cut all you Toppings and garnish into small cubes or slices.
  9. Fill the pasta into a Buddha Bowl and top it with the tomato sauce. The last and most important step take your Buratta out of the package, slice it into two and serve it right away on top of the dish. Add all your toppings and garnish and enjoy this Italian classic.

Buon Appetito!


Ps. If you decide to choose Spaghetti instead of Penne, here is a little life hack which was new to me and maybe is for you as well: http://www.goodhousekeeping.co.uk/food/food-news/how-much-pasta-per-person

Merken

Indian Lentil Daal – “Claire’s all-time Classic “

Indian Lentil Daal -Truefoodsblog View Post

Indian Lentil Daal “Claire’s all-time Classic”

Indian Lentil Daal- Finally, I can share this recipe with you 🙂 Daal has always been one of my favorite recipes! My mom, as a real yogi and an Indian lover,  was always cooking Indian dishes when I was a child, so this is really nostalgic for me. The recipe is one of the first that my mama thought me and I still cook it ever since. It is perfect when you actually only have old carrots and dry stuff in the kitchen and desperate for something filling and healthy but you are broke or something;).

The interesting thing about Daal is 1. it always turns out to me more than you expect & 2. than you realize that the leftovers are even tastier the next day.

I have experimented with all kind of spices and different lentils and I have actually never made 2 daals that tasted the same. In this recipe, I included the measurements of my last and really delicious daal. But actually, I always season it as I feel and it always tastes great (except this one time when I really used too much salt). For the spices: just go to any Asian store, you will find them really cheap and of good quality & they are totally worth having! So be free with the amounts & ratios of spices! Create your own and enjoy!

Indian Lentil Daal -Truefoodsblog

Indian Lentil Daal -Truefoodsblog

How you do it :

  1. Start off with peeling the Carrots and mince them into small little cubes. Mince the onions, garlic, and ginger as well.
  2. Heat the coconut oil on medium heat in a pan and add the onions and garlic as well as the carrots & let them cook until they get kind of glazy and soft.
  3. Add the ginger and all the spices (that is where the magic happens) and stir them around so the onions are covered.
  4. During the spices heat up, bring some water to boil & add it to the vegetable stock.
  5. Add the spices to the onions and stir until they are all covered. Let them also cook shortly.
  6. Add the lentils and mix them with the spices while they heat up.
  7. When the lentils are hot, add the vegetable stock and stir before you cover it with a lid to simmer.
  8. Now you can cook your pasta, rice, quinoa or whatever you prefer as a side dish (we used Canihua, so baby quinoa, which I found in my shelf again, I should look at it more often)
  9. Closely watch the daal and stir them, especially at the bottom!
  10. Occasionally add some water, Lentils are soaking a lot of liquid.
  11. Finish up with tasting your creation by adding more salt or spices.

Raita: simply cut some cucumber into small cubes and add some mint. Mix that with the yogurt, quark, salt, and curry and serve it by adding some cinnamon on top.

Naan: https://www.truefoodsblog.com/recipe/vegetable-stuffed-wholegrain-naan-wrap-truefoods/

I hope you lie this dish, it is my favorite 😉

-Claire

Merken

Merken

Roasted Vegetables Salad & Berry Dressing “fresh from the Garden”

Roasted Vegetable Salad & Berry Dressing- Truefoodsblog View Post

Roasted

Vegetables Salad & Berry Dressing “fresh from the Garden”

Roasted Vegetables Salad & Berry Dressing “fresh from the Garden” or “Just another manic Salad day” so to say. Salty Salad with Roasted Veggies and fruits ? yes please.

Just mix it up sometimes! Without big words today- Enjoy this handsome mixture and stay creative with your food- maybe include your unloved left-overs;)

Roasted Vegetable Salad & Berry Dressing- Truefoodsblog

Roasted Vegetable Salad & Berry Dressing- Truefoodsblog


How you do it :

Roasted Vegetables & Fruit Salad

  1. preheat the oven to 170°
  2. Wash your Fennel, pears and beets and cut them into thin slices. (safe the green thin hairs of the fennel, tate before you waste you know 😉 )
  3. put them on to a backig sheet and drizzle them with 1 tbsp of coconut oil or any oil of choice.
  4. Let them bake for about 10-15 min until they start to become golden brown
  5. Wash the green leafy salad and remove the water properly, otherwise the sauce might get watery and less flavorful.
  6. Place the Salad on your plate or bowl.
  7. take out your vegetabeles and fruits and let them cool.

meanwhile you can prepare your dressing

Berry Dressing

  1. Wash your berries or take them out of the freezer and let them get soft.
  2. Add all the ingridients into a blender and blend it until everything is well combined.
  3. if you do not like the little seeds of the raspberry you can even use a colander and remove all the pits.
  4. i really liked to sprikle some red pepper and flower mix over the dressing, whichI bought from the german company “sonnentor”

Finish the salad by garnishing it with the cooled Roasted Vegetables & Fruits, the pickled radishes, seeds, leftover asparagus tips some watercress, cucumber, berries and the green tops of the fennel.


If you are interested into pickling radishes (wich by the way tasted perfectly in this salad) see our recipe by clicking the link below.

https://www.truefoodsblog.com/page/2/?paged=2
[amd-zlrecipe-recipe:14]

Cantaloupe Salad – Cucumber, Fresh Herbs and Lemon-Thyme Dressing

Cantaloupe Salad - Truefoodsblog View Post

 Cantaloupe Salad – Cucumber, Fresh Herbs and Lemon-Thyme Dressing


Cantaloupe Salad – Cucumber, Fresh Herbs and Lemon-Thyme Dressing. It became so boiling hot over the last past days and I guess summer is finally here ! So what better than to sit in our little selfmade garden and watch the plants growing like crazy and sun bath with them ?

Ach what a life we could have if we would not have exams, final presentations and assignments…But who are we to complain ? We are so happy at the moment and only a few weeks left until Moritz flies to Bali and I am spending my summer working in Germany and spending my summer with my beloved ones at home :3

Today I did not feel like eating something big and warm so I decided to use the leftover cantaloupe and dig into the fresh garden herbs. We are newly experimenting with new dressings, this time it became a fresh lemon-thyme vinaigrette and it perfectly fit this dish. I hope you enjoy it as much as I did.

Cantaloupe Salad - Truefoodsblog

Cantaloupe Salad – Truefoodsblog

How you do it:

  1. Wash all the leaves and herbs in fresh, cold water (we latly use the washing water to water the plants. I know-damn hippie).
  2. Cut the cantaloupe, remove the seeds with a spoon and cut the cantaloupe into slices and remove the peel.
  3. Wash the cucumber and cut it into thin slices as well as the cantaloupe
  4. Mince the herbs finly and add it to the salad.
  5. Really wash your lemon before you use the cest to add it into your dressing
  6. mix all the ingridients for the lemon- thyme dressing in a small glass and set aside
  7. Roast your sunflowers and the chickpeas and let them cool slightly
  8. Place the salad on a plate, add your toppings and the dressing, short before you serve


And if anyone is wondering ?

yes I ate the daisies 😛

-Claire

Vegan Cauliflower Wings – “Hot for Food inspired ” Buffalo and Falafel

Vegan Cauliflower Wings - Truefoodsblog View Post

Vegan Cauliflower Wings –  “Hot for Food inspired ” Buffalo and Falafel

Vegan Cauliflower Wings- WE ALMOST MADE IT ! 1000 followers on instagram. That went so fast! We just started something to share our love and our messages with a lot of hope but no real hard expectations. To see that people are liking our recipes and to hear that they enjoyed the food or that we inspired them is overwhealming.

We were both never those kind of persons who ever though about being highly active on social media but now we are so lucky that we stayed openminded. Social media is not only about a big show off, we really want to use it as a tool to be social, share, inspire and educate. What i tent to say is that our strategy is all about “SLOW MEDIA”– our content is about delivering a story, information and emotions to add value to the things that we share. You need time to consume our content which is everything but what the trend is going to, but the more we are happy to see the start of creating a small community that are sharing the same values as we do or inspire people to be more aware.

For this first mile stone we chose to make one of the most famous recipes of one of my biggest inspirations – Lauren Toyota and John Diemer from Hot for Food.


How you do it :

Buffalo Wings

  1. Preheat the oven to 220°
  2. Line baking paper.
  3. Wash and cut cauliflower head into bite-sized pieces/florets.
  4. Mix flour, milk, water and the spices in a mixing bowl.
  5. The batter should be tripping from a folk easily, otherwise, add more liquid, but also not too liquid.
  6. put the cauliflower into the mixture and coat evenly. Watch out that there is not too much excess batter.
  7. Place the wings on the sheet, they should not touch each other. Alternatively, heat coconut oil in the fryer (we are using the Tefal fryer from the following link because this one is frying perfectly crispy with only 3 % Fat used) Get yourself the with our This Link:  TEFAL Actifry with 50 % Truefoodsblog Discount on the Product now!

    With the fryer, you can fry them crispy and cover them afterward with the marinade before serving

  8. Bake for 25 minutes until golden brown.
  9.  In a small pan, heat the coconut oil until its liquid.
  10. Add the sauces and water and mix until it is well combined.
  11. Once the cauliflower is done its first bake in the batter, remove them from the oven and put all the baked wings into a mixing bowl with the wing sauce and toss to coat evenly.
  12. Bake in the oven for another 25 minutes

find the original recipe on http://www.hotforfoodblog.com/recipes/2014/2/11/cauliflower-buffalo-wings

Falafel wings

  1. Basically, repeat the procedure of the buffalo wings
  2. start with cutting the cauliflower  into wing sized pieces
  3. prepare the batter by mixing together falafel mix or chickpea flour (if you use flour, add some more spices) water, plant-based milk, lemon juice, turmeric, salt, and pepper.
  4. Cover the wings equally and place them on the baking sheet. Alternatively, heat coconut oil in the fryer (we are using the Tefal fryer from the following link because this one is frying perfectly crispy with only 3 % Fat used) Get yourself the with our This Link:  TEFAL Actifry with 50 % Truefoodsblog Discount on the Product now!
    With the fryer, you can fry them crispy and cover them afterward with the marinade before serving
  5. For the oven variant bake them for 25 min until golden brown.
  6. While they are baking, mix melted coconut oil, curry, cumin, coriander, salt, pepper, lemon zest, juice, ketchup, and water.
  7. Cover the wings in the sauce, drizzle the rest of the sauce over the wings and put them back into the oven for 25 min until they are golden brown.
  8. Flip them after 10 min.

Lemon Thyme Dip

  1. Wash the lemon under warm water
  2. remove the wodden sticks of the thyme and cut it finely
  3. mix the yoghurt with all the ingredients and serve cold next to the wings.


Vegan Cauliflower Wings - Truefoodsblog

Vegan Cauliflower Wings – Truefoodsblog


So we are going to binge watch the new season of House of Cards and eat our finger licking tasty buffalo – falafel cauliflower wings .


Thanks for your support and reaching our first milestone toghether

Claire & Moritz


Merken

Merken

Vegetarian Lettuce Wraps – “Summer Snack Collection”

Vegetarian Lettuce Wraps - Truefoodsblog View Post

Vegetarian Lettuce Wraps – “Summer Snack Collection”

Vegetarian Lettuce Wraps – “Summer Snack Collection”. A friend from Germany is here for a visit and the weather is burning hot. It’s the kind of weather in which you do not feel like eating anything that is heated and you are craving something fresh but not too filling. Those Lettuce wraps just seem perfect for a little meal in between until we can finally eat something more filling in the evening.


So perfect that we had some leftover sweet potato fries and beet hummus from the American feast we had the day before – the taste the waste topics again 😉


How you do it:

Sweet Potatoe Fries

  1. Preheat the oven for 180°
  2. Peel the sweet potatoes and cut it into small slices
  3. Rinse the slices in cold water for around 5 min
  4. Dry them with a handkerchief and put it into a zipper with the cornstarch and the seasoning
  5. Put them on to a sheet and drizzle them with olive oil before you let them bake for around 25 min.

Beet Hummus

  1. Add all the ingredients into a blender or a utility which is suitable for a hand mixer and mix until everything is well combined
  2. Season until you have your desired flavour.

Lettuce Wraps

  1. Wash your Romanian Lettuce and divide the Leafs without destroying them
  2. Start with placing the Hummus first
  3. Cut the cherry tomatoes in half, and place them as well
  4. roast the sunflower seeds in a pan
  5. Be playful and combine everything as you like

Enjoy your little Summer snack & do not get a sunburn 😛

Vegetarian Lettuce Wraps - Truefoodsblog

Vegetarian Lettuce Wraps – Truefoodsblog

Merken

Classic Gazpacho – ” Taste the Waste inspiration”

Classic Gazpacho- Truefoodsblog View Post

Classic Gazpacho – ” Taste the Waste”

Classic Gazpacho – We are pretty excited to soon tell you more about the project we have been up to lately! We started participating in the “Taste the Waste” dinners and action in Amsterdam. Which for us is super cool & we are looking forward to telling you more about this. For now: Taste the Waste is a non-profit organisation which wants to communicate and educate about the huge problems we have to face concerning food waste. For the dinner in Amsterdam, they collect food that has been wasted and cooks a huge dinner for everyone that is willing to come. In response, they get a donation which will again support the organisation.

All in one: it’s awesome and we are so excited to become a small part of this movement. Next, to the dinner, they shared the rest of the rescued food which was left over. This time it was: cucumbers. We took some slightly yellow but still perfectly edible ones home and created this classic gazpacho. It’s awesome what you still can create with food that is actually meant to be thrown away.


How you do it:

  1. Peel the cucumber  (you can use the peel for some tzatziki, but it would change the colour of the gazpacho into somehow brownish)
  2. Cut the tomatoes into four pieces. Remove the seeds from the pepper and cut it into rough pieces as well.
  3. Peel the red onion and add it to a blender or facility in which you can blend everything with a hand blender.
  4. Add the vegetable into the bowl, as well as the spices, balsamic and red wine.
  5. Use the blender and mix everything until it is equally blended. Add some mineral water for the extra touch.
  6. Cut the bread into small cubes.
  7. Heat the olive oil in a pan and slightly fry the bread cubes until they are turning slightly golden.
  8. Season them with a pinch of salt & serve the gazpacho with the fresh croutons, cottage cheese and basil

Tip: When it is really hot outside you may add a little bit of crushed ice, in order to cool down the soup.


Classic Gazpacho- Truefoodsblog

Classic Gazpacho- Truefoodsblog

Thank you so much @TastetheWaste for the cucumber and the wonderful experience at your dinner last week.

We are going to publish the article about their amazing projects soon on this blog. Until then..enjoy the wheather and enjoy your gazpacho  🙂


Kind regards from Amsterdam

-Claire & Moritz

Healthy Pancakes – “Lupilove and Chiachocolate”

Healthy Pancakes - Truefoodsblog View Post

Healthy Pancakes – “Lupilove and Chiachocolate”

Healthy Pancakes – and the morning starts off right. We have a long weekend now, but you know how it is: it is just more time to work on your uni-projects. For this exhaustive assignment, have to be fueled. Using up the Lupine flour that I still had on my shelf was the right decision. You never heard about lupine?

Lupine is a typical European protein crop which uses the Ressources of our soil most effectively. It is not only perfectly suitable for the Europeans agriculture but also for the human body. It offers the body plenty of plant-based proteins and nutrients. But we will come to that later and more in detail.

For now its interesting for this recipe. Lupine flour makes everything very moist when you bake with it and it fills you! So don’t be surprised if the dough will be moister as you are used to. The taste is slightly nutty and sweet. Judge yourself and let us know whether you liked it!

How you do it:

Chiachocolate sauce

  1. Add the chia and the milk in a small bowl
  2. mix the spices and the cacao powder and stir until everything is well combined.
  3. Wait 10 min and stir again. When it is too firm add some more milk

Lupilove Pancakes

  1. Mix the grounded flax seeds with some water and set aside for 5 min.
  2. Mash the banana in a bowl and add the flaxseed egg and the buttermilk.
  3. Add the spices and the baking powder and stir until everything is well combined.
  4. Mix the dry ingredients and add them while stirring.
  5. heat a pan and some coconut oil and start baking the pancakes one by one for 3 min on each side.

Top them with the chiachocolate.

If you are ridiculous like us: add some almond butter, fruits, bananas, popped amaranth and basically everything you find in your muesli section:’D

Healthy Pancakes - Truefoodsblog

Truefoodsblog


It was a real feast:3


Hope you enjoyed this recipe and let us know whether you liked it 🙂

-Claire & Moritz[amd-zlrecipe-recipe:9]

Merken

Stewed Rhubarb – “granny’s trick treasure”

Stewed Rhubarb View Post

Stewed Rhubarb – “something from Granny’s trick treasure”

Stewed Rhubarb – its season for Rhubarb right now and you can see the green, red sticks almost everywhere right now. Whether you make a jam, cake or stew out of it, it’s simply delicious and healthy. I remember that I always played with the big leaves of the rhubarb in granny’s garden. Whether it was a had or the new hair of my grandpa, it was always fun!

Stewed Rhubarb - Truefoodsblog

Playing with Opa and Rhubarb – Truefoodsblog

Especially when my Granny made her famous stewed rhubarb vanilla pudding. I never knew what she did that her rhubarb was the only rhubarb I would eat, but I loved it. Last time I visited her she revealed her little secret to me, which I am sharing with you today.

It’s so simple but genius! You all know the feeling on your teeth when you ate rhubarb? This silkiness and almost uncomfortable smoothness of your teeth’s surface? Yes, I do not like it either, but with this little trick you will get rid of it and add some smooth sweetness to your rhubarb. Simply add a banana. The banana will bind the oxalic acid which is responsible for the strange feeling on your teeth. In addition: it just tastes super delicious 🙂

How you do it:

  1. Peel the rhubarb by cutting the ends off and peeling the upper skin from the bottom up.
  2. Cut the rhubarb into pieces in the length of half a finger 😉
  3. Mix the pieces with the sugar, vanilla and the lemon juice and let this soak for around 10 min.
  4. Meanwhile, add the raspberries and the bananas into a heated pan and stir occasionally
  5. Add the rhubarb and let that cook for around 15 min.
  6. Don’t stir too much, so the rhubarb does not lose its texture.
  7. Taste it after 10 min. If it is too sour, add more sugar if too hard, let it cook.
Stewed Rhubarb

Truefoodsblog

I personally like to serve the stewed rhubarb with some vanilla pudding and granola 🙂


Let us know how you like to eat yours!

-Claire

PS: this recipe is dedicated to our good friend Audrey. We miss cooking and enjoying with you too!

Pickled radishes – “Official Garden Harvest Season start”

pickled radishes - Truefoodsblog View Post

Pickled radishes – “Official Garden Harvest Season start”

Finally, all the effort we have put into our gardening project shows up its first rewards. Last Saturday, we had our first harvest of the season early birds the beautiful small radishes. The fact that we sowed enough radishes for 3 families at the end of March, we had an abundant harvest now in May. So what to do with all these beautiful red balls? Of course extending the shelf life by pickling them with inter alia vinegar as a natural preservative.

How you do it:

  1. Wash the small radishes properly. Do not throw away the green part of the plant (use it like spinach in your dishes or blanch it and make a nice pesto out of it -> recipe coming soon)
  2. Combine the vinegar, water, mustard seed, bay leaf, peppercorn, and salt in a small pot over high heat for around 3 minutes cooking.
  3. Sterilise the glass jars and the lid in boiling them 3 minutes in cooking water.
  4. Cut the Radishes in the shape of your choice like corners, sixths, slices or leave it as a whole. You can also leave a bit of the root on top of the radishes, looks more natural (like in the picture above).
  5. Fill the Radishes into the sterilised jars and blanch them with the pickling brew until filled up to the edge of the glass.
  6. Close the glass with the lid when still hot, turn the jar around and leave it covered with a kitchen towel for one night.
  7. Now you can store your pickled Radishes at a dark and room temperature place for at least 5 Days.
  8. After 5 Days the pickled Veggies are ready to eat. Shelf life depends on the hygiene while pickling, but at least one year is not a problem. Perfect to enjoy homegrown food in winter seasons.

Of course, you can add many other ingredients such as Curcuma, Ginger, Zucchini etc. to your pickled radishes to give them another flavor. Feel free to be creative and try out what comes into your mind.

Picture from our first harvest 2017:
pickled radishes - Truefoodsblog

Truefoodsblog


I really hope you enjoy this uncommon vegetable in the world of pickled veggies. Greeting from our garden.

-Moe

Papaya Chutney – “Sweet, fruity & a spice explosion”

Papaya Chutney - Truefoodsblog View Post

Papaya Chutney – “Sweet, fruity & a spice explosion”

Papaya Chutney. We could have also added this recipe to the categories: “taste the waste”. A few days ago I purchased two really beautiful ripe papayas for Moritz because he wanted to try to make a salad out of them. Unfortunately, we found out that you need non-ripe papayas for it. There we were, two persons who really do not like papaya who have two ripe papayas and hate to waste. What to do? We cut one in small pieces and froze them for some ice cream and had some other plans for the other one. I remembered a really good recipe for a mango chutney, so I thought why not try it with papaya? And guess what: it tastes exactly as good as with mango. So if you are trying this recipe and like it, you will enjoy the mango version as well 🙂

How you do it:

  1. Cut the onion into small cubes, as well as the ginger and the garlic.
  2. Peel the papaya and take out the seeds before you cut it in thumbnail big cubes as well.
  3. Add all the ingredients into a big pan and put it on medium heat.
  4. You do not have to open up the cardamom capsules, you just have to make sure to take them out before you serve.
  5. Let your chutney simmer for around 30-40 min before your fill it into a cleaned jar.
  6. Leave your chutney in the fridge and use it within 2 weeks after opening.
Papaya Chutney - Truefoodsblog

Truefoodsblog


We have purchased some really good fresh cheese lately, which we are now enjoying with the chutney 🙂


Vegetarian Spinach Lasagne – White wine lemon bechamel “Moe’s ultimate spinach lasagne”

Vegetarian Spinach Lasagne View Post

Vegetarian Spinach Lasagne- “Moe’s ultimate spinach lasagne”

Black Forest Salad Bowl with pine needles and Misovinaigrette- “Make Salad Great again”

Black Forest Salad Bowl - Truefoodsblog View Post

Black Forest Salad Bowl with pine needles and Misovinaigrette – “Make Salad Great again”

Black Forest Salad Bowl. It’s finally salad time again. Believe it or not, one of my favourite dishes is a salad. You are basically unlimited with your creativity. The more creative you are and the more toppings you have the more fun it will be to eat salads. Yes even for you, you salad grouches. I was at home for a few days to visit my family and friends in Germany and of course to cook with my mum again. You have to know that my mum always has the craziest inspiration for me to cook. Her crazy edible surprise – apple green pine needles. The tips of pines are growing right now and you can surely differ them from the stiff, not tasty old needles. The tips are apple green and you can easily remove them from the rest. They taste like forest and sometimes even sour. So why not add them to a salad ?? So in my creative rush, I chopped in all different kinds of toppings and it turned out to be super tasty and beautiful. But hurry! The green tips are becoming more and more bitter the more they grow.


How you do it:

  1. Wash the salad and dry it properly. Then add it into your bowl of choice.
  2. Cut the Tofu and the Beet into thin slices and place it on the salad
  3. Mix the vinaigrette in a separate glass. Give it a good shake.
  4. Wash the pine needles and mince them properly. Drizzle them over the salad.
  5. Add the rest of your toppings. – My tip: place the cottage cheese on the edge of the bowl and drizzle the jam over it, as well as over the rest of the salad.Adding jam on a salad may seem weird for you but jam is a secret ingredient that makes every vinaigrette perfect! With this bowl, it’s only separated.
  6. You can even throw the tofu and the chickpeas into a pan and wipe it off with some soy sauce for some extra flavour.
  7. When you are satisfied with your toppings, add the vinaigrette and enjoy!
  8. I personally always have a good piece of whole grain sourdough bread next to my salad- the nice thing is: you can put some cottage cheese and jam from the bowl on it to have a small dessert 😉
Black Forest Salad Bowl - Truefoodsblog

Truefoodsblog

I really hope you enjoyed my little creation. Greetings from the finally summery Amsterdam.

-Claire

Dandelion Jam – “vegan honey”

Dandelion Jam – “vegan honey”- Truefoodsblog View Post

 Dandelion Jam – “Vegan Honey”

Dandelion Jam – “vegan honey”. I remember exactly the day when my mum and I made this jam for the first time. I remember searching dandelions in the wine yards and the grass fields around our house. How we washed the blossoms and me preparing the flowers so my mum could cook jam out of it. We also collected the young leaves and made a wild salad with cooked eggs, eatable flowers and orange. The funny thing is that when I was a kid, those recipes and extraordinary cooking of my mum almost embarrassed me. “Oh Mum! Why can’t we just eat like normal people? Some spaghetti, Nutella or normal bread is all I ask for” where the things I used to say when I was around 6 years old and perceived how other children my age used to eat.

Childhood_Memories_Truefoodsblog

Childhood_Memories_Truefoodsblog

Today, I could not be more thankful and inspired by those things. I still have a lot to learn and I can’t wait to spend more time with my mum in the garden when I visit her again. You may also know it: the things for which you may felt embarrassed of when you were a kid are now the most important to you today.  I hope I can preserve as much of her knowledge as I can so I maybe can embarrass my children or nieces in the future.


So here is the recipe of my mums dandelion Jam she used to make when I was a kid. I did not know that it is also called vegan honey, but when I saw it lately I can totally see the connection to the bee product. It is slightly fruitier and less sticky but can be used for the exact same things.

If you also remember that kind of recipes with which you connect the same thoughts let us know. We would love to know them!

Dandelion Jam – “vegan honey”- Truefoodsblog

Dandelion Jam Truefoodsblog

How you do it:

  1. Collect fresh and nice dandelion blossoms (200g are less than you will expect)
  2. Remove as much of the green then you can. It is not bad if you leave it on, it will just influence the taste a bit.
  3. Cook 200g of the yellow blossoms with the water for around 5 minutes.
  4. Let it sit for around 24 hours.
  5. After that, you pour the mixture over a cheesecloth to remove the blossoms.
  6. Add the juice of one lemon and the jam sugar.
  7. Stir continuously while letting it boil and let it simmer for 40 minutes.
  8. Fill it into good washed glasses and enjoy.


Vegan Honey by Truefoodsblog

Vegan Honey by Truefoodsblog

I really appreciate those old recipes. If you have a recipe to share let us know!

But for now: enjoy your vegan honey 🙂

-Claire

Vegan Honey by Truefoodsblog

Vegan Honey by Truefoodsblog

[amd-zlrecipe-recipe:48]

Merken

Merken

Merken

Merken

Raspberry Nicecream Bowl – “Ambassador of Spring”

Raspberry Nicecream Bowl - Truefoodsblog View Post

Raspberry Nicecream Bowl – “Ambassador of Spring”

Raspberry Nicecream Bowl – Banana Ice Cream and Raspberries topped with cherry flowers.How trashily kitschy can a dish be?! 🙂   Nicecream ? – simply the combination of the word banana and ice cream. But still – this combination is unbeatable for the first warm days of spring and later for warm summer days. my addiction for banana ice cream started two years ago when we had a huge purchase of bananas. You all know it: You buy bananas and they become ripe too fast for you to eat them in a whole. That was the moment when I looked for ideas and bumped into a recipe for banana ice cream. I just cut my surplus bananas and put them in a freezer and after a few hours of waiting and 5 minutes of preparation, I was addicted. The taste is not at all like banana but I guess you have to find yourself. The best thing: you can combine it with whatever ingredients you prefer. From chocolate to any kind of fruits – anything is possible.

How you do it:

  1. If you did not do it yet, cut your bananas into medium sized pieces and let it sit for at least 4 hours in the freezer.
  2. Once you did that you take them out, as well as your frozen raspberries. Put them into your high-performance blender. If you don’t have a good blender, let the fruits sit for about 5 min so it is easier to blend.
  3. Add your spices and half of the milk or plant based product.
  4. After you did that you start blending. Add the rest of the milk in little batches.
  5. Only stir when the machine is turned off!!!!!! Really important.
  6. Blend and stir until you get a smooth, even texture.
  7. Put your ice cream in a bowl and top it with your favourite ingredients. One of my favourite combinations is plane Nice cream and cacao nibs – simple but super satisfying.
Raspberry Nicecream Bowl  - Truefoodsblog

Truefoodsblog


Nicecream is not only super delicious and is not only the basis for the uncountable combination of flavours but also more healthy than normal ice cream. Other than the standard summer snack it contains fewer calories and if you take the right bananas it is also really healthy. So what are the “right” bananas? Click the link to find out:http://www.sun-gazing.com/health-benefits-eating-black-spotted-bananas/

Enjoy !

-Claire


Buddha Bowl – Vegetable Tumeric Stew “sunny spring day delight “

Buddha Bowl - Vegetable Tumeric Stew View Post

Buddha Bowl – Vegetable Tumeric Stew “sunny spring day delight”

Posting from the poolside of our riad in Marrakesh – Marocco. Yesterday we had a long trip through the atlas mountains and had a unique insight into ancient argan oil production. The last days we went out for dinner but today we decided to cook ourselves. Curious what Moritz is going to surprise me with. Of course, we want to keep on track and post something for you this week. So I am going to spend the time while he cooks with preparing this post.

Last week we got a lot of inspiration from all the beautiful Buddha Bowls that are out there. So what is a Buddha Bowl? A “Buddha Bowl,” as defined by urban dictionary, is, “a bowl which is packed so full that it has a rounded ‘belly’ appearance on the top much like the belly of a buddha.” And I guess we felt like little buddhas as well after this delightful meal. Bowls are simply the best. Moritz was responsible for the sauce, soy noodles, and the coconut crunch, whereas I took care of the vegetables and the salad we had aside.

How you do it:

Tumeric vegetable stew

  1. Preheat an oven to 180°.
  2. Start with breaking half of the little roses from your cauliflower and cut them in half, so they are more or less the same size.
  3. Cut the pepper into medium sized squares and the carrots into thin small sticks. The baby potatoes you simply cut in half. Leave the garlic gloves in whole.
  4. Mix the rice vinegar, agave syrup, turmeric powder, soy sauce, orange juice, roasted sesame oil, salt and the sesame seeds together in a small bowl.
  5. Put the vegetables into an oven confirmed pan and pour the sauce over. Mix it with your hands so every vegetable piece is equally covered with sauce. (your hands will be so yellow 😀 – but it’s good for your skin)
  6. Put the stew into the oven for around 30 min.
  7. Boil some water and sauté your broccoli and cook some rice or quinoa aside.

Tumeric sauce

  1. Preheat the coconut oil in a pan and cut the onion into small pieces and saté it on a medium heat.
  2. After the onions are becoming glazy and slightly brown you want to put in the minced turmeric and give it a good stir. After you have done that, add the yellow curry paste and stir again before you put in the coconut milk. Let it simmer for a couple of minutes.

Coconut Crunch

  1. Again heat up coconut oil in a pan (it’s simply the best for any Asian touched dish, as well as for your health compared to other oils) and put in the coconut stripes.
  2. If you have a fresh coconut find the instruction under:http://www.wikihow.com/Open-a-Coconut
  3. Moritz always cuts the coconut by starting in the middle and cutting to the outside, going around the coconut again and again until the stripes fall out easily.
  4. After 2-3 minutes add the cane sugar and let this caramelized (cane sugar because it doesn’t burn as quick as any equivalent)

As Buddha Bowls are always about creating your own mixtures you can add whatever ingredients you prefer. We decided to go for some green soy been noddles as well, which are currently our favorite. The texture is slightly more crunchy and you have a good source of plant-based protein as well.

Hope you enjoy your Buddha Bowl while I am going to dig in for what Moritz has suprised me 🙂 Greetings from another continent.

-Claire & Moritz


Vegan Protein Cookies – Cacao Nibs and Peanut – “Planty of power”

Vegan Protein Cookies- Truefoods View Post

Vegan Protein Cookies with Cacao Nibs and Peanut – “Planty of Power”

Vegan protein Cookies ! Moritz and me are packing our stuff today. Tomorrow at that time we will sit in the airplane heading to Marocco. The excitement is rising and rising. Of course, we need to back some snacks and treats for the journey,  so I made some cookies as a treat. I still had a recipe by a friend that I wanted to try, which I took as a basis for this recipe. Use this recipe to add all of your favourite toppings. Raisins, oats, nuts and seeds are perfect add-ins to make them your own.

How you do it:

  1. Preheat an oven to 180 °
  2. Start with mashing a ripe banana in a bowl, until it has a smooth texture.
  3. Add the applesauce, peanut butter, protein powder, baking soda and the spices and mix again, until everything is blended.
  4. After everything is well combined add the dry ingredients. If the dough is too moist, add oats or flour.
  5. Take out a spoon of dough and make small balls which you place on a baking sheet.
  6. The cookies won’t expand as much so you can place a max of 12 little balls on your sheet.
  7.  Bake the balls for around 10 min until they get small cracks on their surface. Take a spatula and lightly press down the balls so they get the typical cookie shape.
  8. Let them bake for another 20 min then take them out to cool. don’t leave them on the hot sheet, they will cook further and get try)
  9. Mix the peanut butter and the syrup and drizzle it over the finished cookies.

Enjoy your little treats, people! You will hear from us when we come back 🙂 Don’t worry, we won’t forget you. We will take plenty of inspiration, crazy spices and recipes home for you.

Vegan Protein Cookies- Truefoods

Truefodsblog


-Claire

Rasberry Asparagus Salad – Grilled green Asparagus with Rasberry Vinaigrette

Rasberry Asparagus Salad View Post

Rasberry Asparagus Salad – “Bring the Spring to your plate”

First days of spring and its finally asparagus time again! We found some really fresh ones at the farmers market yesterday and stored it in the fridge in a wet towel. With this method, it will stay fresh for a couple of days. Of course most people now asparagus as the white sticks that fit perfectly to sauce hollandaise and butter potatoes, but listen up. The green sister of the thick white legumes should not be underestimated.  The green asparagus is full of fibre, folate, vitamins A, C, E and K, as well as chromium, a trace mineral that enhances the ability of insulin to transport glucose from the bloodstream into cells. For me personally its more delicious as well. Definitely, give it a tr if you can access it. So here is the first asparagus recipe but definitely not the last one.

How you do it:

  1. Wash your asparagus. Cut the woody ends and shave it if necessary, up to the middle of the stick max.
  2. Cook water in a pot with some salt. When it’s cooking, add the asparagus for around 2 minutes. Directly take them out of the boiling water and put it into cold water and set aside.
  3. Start with your dressing by adding all ingredients into a jar. Put the lit on and give it a good shake. Adjust the taste by adding either more jam or salt.
  4. Heat olive oil in a pan and add in your blanched asparagus. Sprinkle some sea salt over it and saute it on a rather high heat so it gets golden brown on the sides but does not cook too much. Use the leftover heat of the pan to roast your sunflower seeds
  5. Cut your apple into quarters and remove the seeds. Try to cut the apple in very thin slices. If you are a bit clumsy try to use a peeler (no one likes blood on their apples).
  6. After you cut your apples, place them one over another on the edge of your plate and sprinkle some lemon juice over it.
  7. Take the grilled asparagus out of the pan and place it in the middle on the apples.
  8. Drizzle your dressing over your salad and garnish with your raspberries and some flowers – violets, Indian cress and daisies are etable, so go for them 😉
Rasberry Asparagus Salad

Truefodsblog


I really really enjoyed this dish. We made 3 small servings and ate it as a side dish but I could also imagine making this as a main with some green salad and baby rosemary potatoes aside.

Hope you enjoy this spring dish.

-Claire

Easter bread wreaths – Braided Bread with Parsley-Pumpkin Pesto

Braided Bread with Parsley Pumpkinseedbutter-Truefoodsblog View Post

Easter Brunch – Braided Pesto Bread wreaths

Happy Easter! It’s Easter Sunday and we’ve had a cosy Brunch altogether. Therefore, we baked traditional Easter bread wreaths in a slightly upgraded version: braided wreaths with Parsley-Pumpkin Pesto. The fresh baked bread tastes amazing with salted butter and a boiled egg.

Bread wreaths are a very popular Easter food in Germany. They are usually baked on Easter Sunday from a plain Yeast dough and are served with a coloured Easter Egg in the centre. Our bread wreaths are savoury as the recipe is upgraded with a fresh homemade Parsley-Pumpkin Pesto. The bright green of the fresh Parsley does not only look like spring it also tastes like this. Furthermore, it contains a lot of Calcium and antioxidants.

The bread wreaths are working for every regular breakfast and are also a great recipe for baking with kids. To make your own healthy bread wreath find the recipe below.  Happy baking!

How you do it:

  1. Warm up the rice drink (not too hot, it should be hand warm). Pour it into a mug and add yeast and sugar, stir well until the yeast has dissolved. Mix Flour and Salt in a separate bowl.
  2. Combine yeast-milk, flour, and water and knead into an elastic, non-sticky dough. Add more water or flour if needed. Cover the bowl with a towel and place it in a warm place. Let it rise until the dough has doubled its size.
  3. Preheat the oven: 200°C, two-sided heat
  4. In the meantime pick the leaves from the Parsley-stalks, add nuts, seeds, pumpkin seed butter, oil, and spices. Blend until the pesto has a smooth texture.
  5. Knead the dough once again and divide into five similar pieces. Roll out each piece and spread a thin layer of pesto on the whole surface. Wrap up in a roll and cut into three sections. Braid the strings and combine the two ends to create a wreath.
  6. Place the wreaths on a baking sheet and bake for 20-30 Minutes


Braided Bread with Parsley Pumpkinseedbutter-Truefoodsblog

Truefodsblog

Let them cool for a bit and enjoy them warm with salted butter. Even though they taste best when they are fresh, the wreaths can be stored for 2-3 days.


-Fiona

Stuffed Red Bell Pepper – ” Old but Gold “

Stuffed Red Bell Pepper- Instagram Truefoodsblog View Post

Stuffed Red Bell Pepper


Stuffed Rd Bell Pepper – Old but gold. Today it was Moritz turn to make dinner and as always he managed to turn something familiar into something super delicious and special. That is life when you life with a chef! J #luxury

Special Herb:

He included a pinch of our all time special herb called “fenugreek” which you can find in any good organised organic store or even conventional supermarket. For all the Germans here – it’s Schabziegerklee.

It has a very unique taste which is not found somewhere else or at least is difficult to be compared with. It perfectly fits guacamole and anything which you want to taste like a really herby vegetable soup (maybe that description fits). Sometimes you can find it as special ingredients in cheese. You might recognise it in some of our upcoming recipes as well, so stay tuned if you want to get more inspiration for what you can do with this fancy herb.


So here is Moritz version of the stuffed red bell pepper. Served on one of the beautiful self-made pottery plates from our dear friend Yueky. Definitely check out  web pagepage and Instagram : http://yueky.com/


How you do it:


  1. Preheat the oven to 200°.
  2. Cut the onion, garlic and the zucchini.
  3. Heat some olive oil in a pan and put one small piece of onion in. The oil has the perfect temperature when there are bubbles around the onion. Put in all Onions and the garlic and cook them until they start getting golden.
  4. Meanwhile, drain the can of chickpeas and put them into a vessel or your foodprocessor.
  5. Add lemon juice, salt, pepper, red pepper powder, coriander powder and a pinch of fenugreek if you have It and mix until you have a smooth texture.
  6. Put the zucchini into the pan and let it cook until it starts to get golden brown. You can also add some of the schabziegerklee as well.
  7. When the zucchini is almost done, add the vegetable browth and set aside
  8. Cut off the head of the Bell Pepper and remove the seeds and the thin white skin.
  9. Start with stuffing the Bell Pepper with Hummus until half is full.
  10. Add the zucchini and top it with the feta.
  11. Put the Bell Peppers and their heads on a backing sheet and put it into the oven for about 30-40 min until the skin of the pepper partly gets brown.
Stuffed Red Bell Pepper- Instagram Truefoodsblog

Truefoodsblog

Enjoy with some rice or quinoa. Recipe by Moritz

-Claire