Creamy Spinach Tofu Curry “Vegan Green Curry heaven “

Creamy Spinach Tofu Curry- TruefoodsblogCreamy Spinach Tofu Curry- Truefoodsblog View Post

Creamy Spinach Tofu Curry

Creamy Spinach Tofu Curry –  The best goddamn spinach curry I have ever made :)))) This Curry is creamy, tangy, salty and crunchy in between!

I just made one fault. I am not the biggest rice eater, so I decided to eat the curry as an autarc meal in one. Mistake ! I was rolling around, trying to lay on my back, on the sides or on my belly because I was so full!  Normally you would eat a curry as a side & than a whole can of Coconut Milk isnt a big business but Please ! dont eat it as a whole dish without anything else if you are not used to eat 50g of pure fat in one 😀

Beside from that I loved the curry & you will feel the same if you are a creamy sauce fan like me.

"<yoastmark

How you do it :

  1. Start with heating some coconut oil in a pan as well as in a pot for the spinach.
  2. Cut the tofu into cubes and add it to the pan on medium to high heat to fry. Stir occasionally until it gets golden brown.
  3. Meanwhile mince the onion, garlic and ginger. Add that to the heated coconut oil in the pot on medium heat.
  4. Stir until the onions get glossy and soft, then add the curry, coriander, cardamon, turmeric and the cumin. Let the spices heat trough. Stir this mixture so all the minced onions are covered in spices.
  5. Add the spinach to the spices and stir until it slightly starts to fold in.
  6. When the spinach reduces in size, add the coconut milk and stir again. Take a blender and mix the spinach until you have a creamy curry. Add the salt and the chili powder and let this simmer for 1-2 minutes before you add the tofu.

Serve with rice and a little yogurt (or soy/coconut/oats equivalent)

[amd-zlrecipe-recipe:37]

Vegan Cookie Taco Shells – “S’more Tacos- Hot for Food inspired”

Vegan Cookie Taco Shells- Truefoodsblog View Post

Vegan Cookie Taco Shells – “S’more Tacos- Hot for Food inspired”

Vegan Cookie Taco Shells – “S’more Tacos- Hot for Food inspired”- ones again an amazing inspiration by the wonderful team of “Hot for Food” – Lauren and John. I am trying to bake again people 😉

Today we are going to make Vegan Cookie Taco Shells. Moritz lately has an obsession with Mexican food. Unfortunately, we don’t live together anymore and its quite hard to make good photos in Moritz’s rather dark apartment. Otherwise, you could have seen what magical Mexican food is being created in his kitchen at the moment. Luckily we still have my apartment and now that it’s finally weekend we also have time to cook there together. Again something sweet for our sweet guy. Of course, we will also do something savoury, which you most likely will see in the next recipe, so be excited 😉

We started a new kitchen adventure which is called jackfruit. So if anyone can recommend a good recipe, please let us know in the comments. Without any further redo – lets get started with our Vegan Cookie Taco Shells


Vegan Cookie Taco Shells- Truefoodsblog

Vegan Cookie Taco Shells- Truefoodsblog


How you do it:

vegan cookie taco shells (need to sit cool for at least 1 hour in the fridge)

    1. Start with mixing the flour, baking soda, cinnamon and the salt in a big bowl.
    2. In a seperate bowl mix the sugar, vanilla, vegetable oil and the plant based milk together.
    3. Add this to the dry ingredients and combine it until it gets crumbly, then continue with your hands until the warmth of your hands combines everything and makes it smooth
    4. Take a part of a baking sheet and fold the dough into it.
    5. refrigerate for at least 1 hour
    6. preheat the oven to 170°
    7. slightly kneet the dough to warm it up again. Than start flattening the dough until its around 0,5 cm high.

then form a roll with aluminium foil which should be as thick as your forearm and place it on a baking sheet. You want to do that to form the taco shells than

  1. taking a medium sized glass and cut out little cookies. Lay them over the alu rolls & bake this for around 12 min.
  2. Let the shells cool while you are preparing the stuffings.

banana caramel & apple pie

  1. Cut an apple into small cubes & place them in a pot on medium heat. Add the lemon juice & zest as well as the cinnamon and let that simmer for around 10 min
  2. In another pan heat some coconut oil & cut the bananas in pieces. Bake them for around 3 minutes on each side until they are caramelized.
  3. In a small pot mix together the cacao powder, plant based milk and the agave syrup & let this reduce until it has your favourite chocolate sauce texture.

stuff the tacos & enjoy !!!

winter is coming people 😉 😛

[amd-zlrecipe-recipe:36]

Romanesco two ways with Mango Peanut Curry Dip “aka Fransceco Romanesco”

Romanesco two ways with Mango Peanut Curry Dip - Truefoodsblog View Post

Romanesco two ways with Mango Peanut Curry Dip “aka Francesco Romanesco”

Romanesco two ways with Mango Peanut Curry Dip “aka Francesco Romanesco” – So yesterday Moritz bought a Romanesco fresh from the farmers market.

As you might know Moritz, he always uses to play his word games and give basically anything a ridiculous name. No difference for Romanesco. So before I even had the chance to find out how Romanesco tastes like I already knew him as Francesco. I mean I love the names Tim Thyme and Rosy Rosemary :).

So now I finally had the chance to meet Francesco Romanesco in person and he tasted like the perfect middle of broccoli and cauliflower. To really enjoy the flavor we left one-half simply steamed and coated the rest in a chickpea batter which we baked in oil. Mmmmh that was pure Souldfood. For those of you who would like to have the best recipe for sweet potato fries, just follow this link: Sweet Love

Romanesco two ways with Mango Peanut Curry Dip - Truefoodsblog

Romanesco two ways with Mango Peanut Curry Dip – Truefoodsblog

How you do it:

Romanesco two ways

  1. First, wash and cut the Romanesco into the little trees. Heat some water with salt in a pan to steam the one-half.
  2. Meanwhile, mix the Chickpea flour with the plant-based milk and the spices in a bowl.
  3. Heat coconut oil in the fryer (we are using the Tefal fryer from the following link because this one is frying perfectly crispy with only 3 % Fat used) Get yourself the with our This Link:  TEFAL Actifry with 50 % Truefoodsblog Discount on the Product now!
  4. Dip the Romanesco into the batter and directly start frying it in the Tefal fryer or alternatively in a Pan with Coconut oil.
  5. Meanwhile, put the other half into the cooking water for around 3 min.
  6. Bake the Romanesco until they are golden brown from both sides. Not too hot, otherwise they won’t be done inside. If you have any struggle with baking it through you can always place the trees on a baking sheet and just bake it in the oven for a few more minutes.

Mango Peanut Curry Dip

  1. Start with peeling the onions and the garlic and mince both. Heat the coconut oil in a pan and start with the onions and the garlic, by heating them up and let them get soft and glazy on a low to middle heat.
  2. When the mixture gets golden brown, add the Curry, coriander and chili powder and stir until the spices are well combined with the onions. Let the spices heat up entirely.
  3. Add the vegetable broth and stir. Add the Peanut butter and stir until it has dissolved, then add the coconut milk. Peel the mango and cut it into cubes. Add it after you are done.
  4. Let this simmer for 3 more minutes. Blend the Sauce with a manual blender until you get a smooth even texture.

Serve with the potato fries and the sauce aside. Just dip and enjoy!

[amd-zlrecipe-recipe:35]

Vegan Cashew Sour Cream – “This is Nuts “

Vegan Cashew Sour Cream - Truefoodsblog View Post

Vegan Cashew Sour Cream – “This is Nuts “

Vegan Cashew Sour Cream – A absolute must have for every vegan, but a definite “have to try” for everyone who is curious for new tasts or simply wants to find a healthy alternative to the fatty, mostly full of additives dairy version from the super market.

Vegan Cashew Sour Cream - Truefoodsblog

Vegan Cashew Sour Cream – Truefoodsblog

Of course, there is a difference in taste between the dairy version and the cashew alternative. I would describe the vegan version as more cheesy, tangy, creamy. You can actually create your own taste by either adding more nutritional yeast to make it more cheese like, more apple cider vinegar for sourness and more lemon or even lemon zest to create a fruity, refreshing tangy sauce. Perfect for Bruschetta, which we also made for the Truefoodscatering Boarding House Morbach. Therefore you just want to roast some bread with olive oil which you might have soaked herbs & garlic over night. Bake it for around 6 minutes at 180° C, add the sour cream on top & top it with fruity tomato salsa, seeds, and herbs.


Truefoodscatering- Vegane Bruschetta 2

Truefoodscatering- Vegane Bruschetta

How you do it:

  1. The first and main step is to soak the cashews over night. All nuts should be covered in water. If you are in a rush & do not have the time, you can also boil water and let them soak as long as possible.
  2. Add the soaked cashews to a blending utility or any bowl in which you can use a hand blender.
  3. Add the Salt, Yeast, Lemon Juice and the apple cider vinegar, as well as a pinch of white pepper.
  4. Blend until you achieve your favorite texture.

[amd-zlrecipe-recipe:34]

Basic Chocolate Granola Recipe “Its the thing hippies always use to make”

Basic Chocolate Granola - Truefoodsblog View Post

Basic Chocolate Granola Recipe “Its the thing hippies always use to make”

Basic Chocolate Granola “It’s the thing hippies always use to make” – you can buy it everywhere, it has been one of the biggest food trends in 2007: Granola. Once again something what we never wanted to eat when our mums made it. Okay, these days granola came with a lot less sugar and a lot more seeds and raisins. Does not sound to bad now 😀 Today you can buy it everwhere, which is regarding to the actual price of raw material, absolutly rediculous. Just add what ever you want.

There is also a way to make it even more like chunky: Just add two egg whites and mix well. Leave some bigger chunks & enjoy.

Basic Chocolate Granola - Truefoodsblog

Basic Chocolate Granola – Truefoodsblog

How you do it:

  1. Preheat the oven to 170° C.
  2. First mix the dry ingredients like oats, favorite nuts, seeds, cacao, grains or spices. 
  3. Add the melt coconut oil, then the honey or agave syrup. Mix everything with a wooden spoon. Be patient, it takes some effort until everything is well combined, but it will work.
  4. Place the granola on a baking sheet, making a platter not thicker than 1 cm. Leave bigger chunks, they will be the best parts.
  5. Bake this for around 6 min. Then rotate and bake for another 6-10 min. Watch it closely! 
  6. Let it cool on a cold surface, that’s when the granola gets crispy. Store the granola in a closed box & use it within 2-3 weeks.


Other Granola recipes:

Asian – Glutenfree: https://www.truefoodsblog.com/recipe/buckwheat-peanut-tamari-granola-gluten-free-without-regrets/

Curry – Cashew: https://www.truefoodsblog.com/recipe/savoury-granola-curry-cashew-chunks/

[amd-zlrecipe-recipe:33]

Chilled Carrot, Avocado, Miso, young Coconut Soup – “Best Chilled soup ever”

Chilled Carrot, Avocado, Miso, young Coconut Soup - Truefoodsblog View Post

Chilled Carrot, Avocado, Miso, young Coconut Soup ” Best Chilled soup ever”

Chilled Carrot, Avocado, Miso, young Coconut Soup – or the best chilled soup ever ! Yes that is something to say. As already announced in the article “Top 9 Restaurants & Cafes in Bali” this is the recipe of the best chilled soups I have ever had.

In the middle of the Gianyar Ricefields and Mountains I had the pleasure to get to know Dewa, the excecutive Chef of Glow, the restaurant belonging to COMO Shambhala Hotel. You might have read on our blog, avocados are one of the food products we are sceptical towards. Huge amounts of water and ressources are necessary to produce the creamy fruit. The more interesting was the conversation I had with Dewa about this topic. As they mostly use fruits & vegetables out of their own gardens, to secure a save, sustainable nd high quality supply of their raw material, they also take care about the origin of their avocados. For him it was important to say that people do not have to boycott avocados from their meal plans, but that a sustainable sourcing of the water for the plant is of huge importance.


Chilled Carrot, Avocado, Miso, young Coconut Soup - Truefoodsblog

Chilled Carrot, Avocado, Miso, young Coconut Soup – Truefoodsblog

How you do it:

  1. Put the Carrot juice into a blending utility or in a facil in which you can use a manuel blender.
  2. Cut the Avocados, fresh coconut and add the flesh of both to the carrot juice. Blend this with the ginger till smooth.
  3. Add the herbs, coriander seeds, and the oil and blend well. Additional you can strain it through a medium sieve.
  4. You may add a little salt, but be careful 🙂
  5. Garnish it with fresh tomatoes, Parsley, sesame seeds and coriander seed powder

[amd-zlrecipe-recipe:32]

Herby Wholegrain Cheese Sticks – “Snacklovers: this is for you”

Herby Wholegrain Cheese Sticks - Truefoodsblog View Post

Herby Wholegrain Cheese Sticks – “Snacklovers: this is for you”

Herby Wholegrain Cheese Sticks – “Snacklovers: this is for you” –
watching your favoruite series, having a picnic, as a starter for the dinner you organized or just for yourself to have something if the time is limited. The first time we made them was again for the dinner we rganized for friends. They went perfectly next to the garden salad with whipped ricotta & goat cheese starter. Everyone loved to dip the sticks into the lemony mixture & we definatly did not bake enough 😀

Bread Sticks are always the favourite snack if it comes to parties. Here you find the healthy & advanced recipe for the normally very fatty, excessivly packaged and salted ones from the supermarket.

Herby Wholegrain Cheese Sticks - Truefoodsblog

Herby Wholegrain Cheese Sticks – Truefoodsblog


How you do it:

  1. Start with mixing the fenugreek with the milk. Add that to the rest of the flours, grumbled yeast, salt & water and start kneeting this mixture for around 4 minutes.
  2. Afterwards start with stretching & foalding the dough for 5-7 minutes & form a ball. Cover the dough with a blanket & let this sit for around 1 hour in a warm place.

wait 1 hour

  1. Take the dough out of the bowl, WITHOUT Kneeting, so the air does not come out. Start with rolling the dough into a 1 cm high right angled platter.
  2. Brush the olive oil onto the surface. Add a part of the cheese, seeds & nuts on the surface.
  3. Fold the dough to 1/3 of its size. top the folded part with the rest of the toppings & fold the other side on top. The right angle you created that way, now can be cut into 1 cm thick stripes. Sprinkle sesame seeds on top & twist them into each other.
  4. Place them on top of a oiled baking sheet & let this sit for another 15 min.

wait 15 min

  1. Preheat the oven to 220°
  2. Bake the sticks for around 20 min.
  3. You are done when they are golden brown.

[amd-zlrecipe-recipe:31]

Creamy Cashew Pumpkin Sauce with Vegetable Pasta “Ambassador of Autumn”

Creamy Cashew Pumpkin Sauce - Truefoodsblog View Post

Creamy Cashew Pumpkin Sauce with Vegetable Pasta “Ambassador of Autumn”

Creamy Cashew Pumpkin Sauce- with Vegetable Pasta “Ambassador of Autumn”. Not much words today ! We had such a busy 2 weeks now. From the mountains to the streets. I have learned so much working with Moritz in the kitchen, the planning, the schedules, the techniques, the way of speaking, pushing the limits & never let go of the passion. It was such an experience. Those moments and opportunities always remind us on how blessed we are that we are free to do this & have the education to be able to  transfer our messanges in such a beautiful way. Now is the time to find some peace, silence and “slow time”, recharging for our next study year, which starts in two weeks.

Creamy Cashew Pumpkin Sauce - Truefoodsblog

Creamy Cashew Pumpkin Sauce – Truefoodsblog

How you do it:

  1. Boil some water and soak the cashews in it. Pour as much in, so the cashews are fully covered. Let this sit while you peel the pumkin, onions and make some zucchini. Cut them into small cubes each.
  2. Bring some water to boil for your pasta.
  3. Keep the peel of the zucchini so you can mix it with the pasta.
  4. Heat a pan & add some olive oil & start cooking the onions, slowly adding the pumpkin and the zucchini.
  5. Let this cook until everything starts to get soft & slightly golden brown.
  6. Add the vegetable broth powder, white pepper, nutritional yeast and the apple cider vinegar to the soaked cashews. Add the vegetable half, so you have some left as a topping to it & blend it with a hand blender until everything is perfectly combined.
  7. Put your pasta into the pan you used before & add the sauce. Give it a good stir & top it with fresh garden herbs.


As you can see we enjoyed it  with some fresh garden tomatoe salsa. Love tomatoes as much as I can, before the season ends again 🙁

[amd-zlrecipe-recipe:30]

Vegan Tigernuts Quinoa tropical Breakfast

Vegan Tigernuts Quinoa tropical Breakfast - Truefoodsblog View Post

Vegan Tigernuts Quinoa tropical Breakfast

Vegan Tigernuts Quinoa tropical Breakfast – Tigernuts to the fullest plus the quinoa & granola crunch! Mhhhhh, what a beautiful start for the reunion. This is basically our breakfast of the first day in Aichach near Augsburg.

I really missed enjoying breakfast with Moritz. We always celebrate breakfast like no other person. Its always this on-off relationship with whole grain waffles, self-made bread & porridge in all different interpretations. At the moment we are trying to find some alternatives to our really intense carb dishes. Always intense whole grain rice or noodles. Especially Moritz lately suffered from some gut damage & not feeling light & comfortable.

So Quinoa and Tigernuts, which both consists of a more diverse ratio of macro & micro nutrients, are a good variation to try. Tropical fruits for some special occasion of course & to start into the stories of Bali, of which I am very much looking forward to hearing more of 😉


Vegan Tigernuts Quinoa tropical Breakfast - Truefoodsblog

Vegan Tigernuts Quinoa tropical Breakfast – Truefoodsblog

How you do it:

  1. Start with heating your Tigernut mixture and the liquid in a pot over medium heat.
  2. As soon as it starts soaking in the liquid & the mash starts to bubble – add the agave sirup and the quinoa.
  3. Stir from time to time so it does not burn.
  4. Add the coconut flakes and the coconut oil & some more liquid to adjust the texture towards your favors.
  5. Turn down the heat & place the mash on your favoured plates.
  6. Cut a pine apple into cubes & place the cubes on top.
  7. Add the Physalis, nuts & seeds ,apple sauce & granola and enjoy !

[amd-zlrecipe-recipe:28]


Merken

Creamy Grilled Red Pepper & Pilatitomatoe Sauce Zoodles

Creamy Grilled Red Pepper & Pilatitomatoe Sauce Zoodles - Truefoodsblog View Post

Creamy Grilled Red Pepper & Pilatitomatoe Sauce Zoodles

Creamy Grilled Red Pepper & Pilatitomatoe Sauce Zoodles – Mediterranean Summer Dish. It was again time to cook something that suited the burning hot weather.

Bavaria is a dream, especially when the sun comes out. The sleepy villages, farms, families, and gardens are creating such a romantic atmosphere and really made me feel home, regardless of any prejudices. Today we made a tour with the bikes and drove from one garden to another and collected all the fresh vegetables we could carry in our bags. We carried the freshest tomatoes, cucumbers, arugula, and raspberries home.

It was still boiling hot, so we decided to cook something refreshing.

This dish really brought out how much different legumes can taste when they are fresh and local and not produced on a big scale. The zucchini was almost sweet and smooth as well as the super fleshy tomatoes which smelled amazing too.

Creamy Grilled Red Pepper & Pilatitomatoe Sauce Zoodles - Truefoodsblog

Creamy Grilled Red Pepper & Pilatitomatoe Sauce Zoodles – Truefoodsblog


How you do it:

  1. Start with heating some olive oil in two pans. Wash your tomatoes and the pepper. Cut the pepper into cubes and the tomatoes in half. Mince an onion and fry it in one of your pans until they get soft and slighty golden brown. 
  2. Add the Pepper to the other pan and fry it until the whole pepper gets soft. Its not bad when the pepper gets dark on one or two spots, that just adds flavour as well.
  3. Add the finsihed onions and pepper to a blender and add some olive oil to one of the pans again to cook the tomatoes. Add some salt to them and let them simmer until they get soft and the juice comes out and starts to thicken. Thats when the flavour develops.
  4. Add the Tomatoes together with the Black Pepper, Basil, Rosemary , soaked cashews & nutritional yeast (vegan) or feta cheese and Salt to the blender.
  5. Blend the sauce until everything is well combined. If you want to garnish your dish with some roasted tomatoes start to use the rest of the heat from the stove to fry 4 in the used pan with the cutted surface facing downwards.
  6. take a shaver and shave the zucchini, or if oyu have a zoodle machine use it. Place the zucchini stripes to your plates and add the sauce to it.

Fresh vegetables from the garden make a huge different in taste, smell and environmental footprint.

If you dont have the time or the access to your own garden, always try to buy as local as possible. Either in the supermarket or at a local farmer of your trust 🙂


Enjoy your day ! & soak in the sun !

[amd-zlrecipe-recipe:27]


Savoury Wholegrain Breakfast Waffles – “Waffles of Heaven”

Savoury Wholegrain Breakfast Waffles - Truefoodsblog View Post

 Savoury Wholegrain Breakfast Waffles – “Waffles of Heaven”

Savoury Wholegrain Breakfast Waffles – How to start your day right with everything you need. The Cucumber and the Tomatoes are both fresh from the garden. I guess this used to be one of our favourite dishes to start our days back in the Netherlands. Normally, we also added fresh avocado but since we started boycotting them we use the beautiful vegetables we find in the garden and elsewhere.

If its intersting for you why you should maybe reduce your avocado consume, although you are such an avocado lover like us – here is a link to a good article where you find some information: http://www.telegraph.co.uk/food-and-drink/news/healthy-foods-that-are-ruining-the-environment/

This is by the way the first recipe which includes meat. Many People ask me wheater we are a vegetarian or a vegan blog but actually we try not to restrict ourselves in any pattern. Our goal is to live in balance with ourselves and our environment. This is what we are representing in our recipes as well. Today Moritz felt like eating some parma ham, although is actually aso not the biggest meat eater, whereas I have been a vegetarian my whole life now.

Savoury Wholegrain Breakfast Waffles - Truefoodsblog

Savoury Wholegrain Breakfast Waffles – Truefoodsblog


How you do it:

  1. Heat your Waffle Iron
  2. Start with mixing your eggs and the milk (or plant based) with a hand mixer and slowly add your flour, baking powder and salt until everything is well combined and fluffy.
  3. Oil your iron with coconut oil and add a big spoon full to your iron and let it bake for around 3 min.
  4. Cut the cucumber and the tomatoes in thin slices and place them on your plate of choice and garnish it with line oil.
  5. Heat some water with vinegar. Heat it to the point at which it gets bubbly but not cooking fully. Crack the egg into a small cup. Take a spoon and bring the water to turn in a quick circle. Add the egg to the water in one rush, but still carefully.
  6. Place the Waffles on top of your vegetable bed together with the poached egg and the ham if you please.
  7. Top it of with raspberries, goat cheese, nuts & seeds of choice, some salt and black pepper and the fresh cut herbs.

I hope you have a great day & start your day with lots of positive engery.

Always remember that a big breath and a small moment of silence can change a differnt within yourself !

[amd-zlrecipe-recipe:26]


Merken

Merken

Redwine Canned Plums – “Preserving Summer”

Redwine Canned Plums - Truefoodsblog View Post

Redwine Canned Plums – “Preserving Summer”

Redwine Canned Plums – Preserving Summer. Short but sweet introduction: Its post & pre-festival time at the moment for me and Berlin Boys Time for Moritz. We both very much enjoyed our summer. Next Monday I am finally visiting him in Bavaria were a lot of stories and waiting for us to be told :)) but for now –  Plum season comes to its peak & if you are any like me you love plums so much you never want to come this season to an end. With this convenient method its possible to keep some summer preserved for the hard times in Winter. The recipe is from my grandma & the nice thing about it is: you can basically do it with any kind of fruit that you want!

Redwine Canned Plums by Truefoodsblog

Redwine Canned Plums by Truefoodsblog

Like a lot of us, my grandma is the one that has set the first milestones for my love for food. She thaught me so much and inspired me for ancient recipes and preservation methods.

So without any further reduce – this is the recipe on how to preserve summer:

Redwine Canned Plums - Truefoodsblog

Redwine Canned Plums – Truefoodsblog

How you do it :

  1. First, start off with sterilizing the glasses you want to use. Do this by heating water in a big pt and cook the lits and the jars for around 5 min. Try to touch them as minimal times as possible afterward. (keep the water in the pot afterward for later)
  2. Wash the plums, cut them in half and take out the pit.
  3. Bring the Water and the Red Wine with the anis, vanilla bean (cut open and scratch mark in) and the cinnamon to a boil.
  4. As soon as it starts to bubble, add the sugar and stir until it has dissolved. Take out the spices.
  5. Place the plums close next to each other into your prepared jars & add as many liquid until the plums are all covered.
  6. Heat the water in the pot again & place the filled jars plus their closed lits into it. The glasses should be covered 2/3 with water. Bring the water to simmer and let them sit for 20 min.
  7. Let them cool and check wether they are fully closed by checking the lits by pushing the middle. If it makes a cracky noise, they are not closed.

[amd-zlrecipe-recipe:23]

Whipped Lemon Goat Cheese Edible Flower Salad “Salad for Friends”

Whipped Lemon Goat Cheese Edible Flower Salad - Truefoodsblog View Post

 Whipped Lemon Goat Cheese Edible Flower Salad “Salad for Friends”

Whipped Lemon Goat Cheese Edible Flower Salad – As you might guess from the title: this beautiful starter was created for a dinner for friends. We already posted the recipe of the dessert, so we kind of go backwards through our dinner we had.

Edible flowers have absolutly been my thing! especially Indian cress with its spice. The zucchini coconut soup was the perfect start to the indian cress season. Now our whole garden is full of them. They definatly are a good help for conversation if your guests have to do a dare to eat your starter.

Currently I am at the construction week of Lott & the granola I made is already empty – full sucess. Tomorrow I am very looking forward to make a professional wine tasting with a friend.  There is no place in the world I would rather be now. I was also part of the cooking/kitchen team & its really more work than I would have imagined to cook for around 150 people every day 😀  But i have to stay focused on writing this recipe while I am sipping on my uncounted glass of white wine ;))) 😛

Whipped Lemon Goat Cheese Edible Flower Salad - Truefoodsblog

Whipped Lemon Goat Cheese Edible Flower Salad – Truefoodsblog

How you do it:

  1.  Start with adding the ricotta and the goat cheese into a bowl in which you can mix them together. Add the Zest of the whole lemon as well as the juice, white pepper and mint.
  2. Start whipping the mixture until it is completely blended and airy. Take two spoons and start measuring one spoon of whipped cheese, place it on the pomegranate seeds and roll it around until you get a fully covered cheese ball.
  3. Place the green leaves, cut cucumber, tomatoes, radishes and the edible flowers on your plates.
  4. Mix the raspberry jam, vinegar, herbs, pepper, salt, oil and fresh herbs in a small jar & set aside.
  5. Place the finished balls of cheese (you can also cover them in seeds or any herb mixture) on the side.
  6. Serve by adding the dressing on the plates shortly before serving

PS: I also fried some Lupine Tempeh – Recipe is somehing on its own !It was amazing. I also served some selfbaked bread on the side .[amd-zlrecipe-recipe:22]

Beet Apple Peanut Salad with Raspberry Vinaigrette “

Beet Apple Peanut Salad - Truefoodsblog View Post

Beet Apple Peanut Salad with Raspberry Vinaigrette

Beet Apple Peanut Salad with Raspberry Vinaigrette – Red Beet seems to be the big thing for us at the moment & again it’s in the combo of red fruits but this time also with peanuts.

The same like with pumpkinseeds oil & vanilla ice-cream, Peanut butter & Beets was shown to me by someone who is really close to me. My cousin Amelie, who always used to share the same passion, the same love for food as me. When we are in the kitchen we are just melting to a ridiculous couple who is creating the most time taking, detailed meals. I remember the time we were responsible for the Christmas dinner a few years ago 😀

Food is such a strange & complicated theme nowadays. Are you vegan are you vegetarian? What should you eat to loose weight, to grow muscles or to stay slim? Maybe fully raw vegan ? or maybe Paleo… I guess everyone is annoyed by that (reluctantly vegan :P). So these foods that are actually inspired by the people I love are tasting the best & for me:

So these foods that are actually inspired by the people I love are tasting the best & for me: Food is remembrance. Its a way of capturing a moment or a person for me & that makes food such a magical thing & not a religion ! Its your own book of memories. Especially when the Beet comes from the garden of my grandpa, who has worked for it, took care & gave it his full attention as his garden is one of his biggest hobbies. Topped by the fact that I eat the homemade bread of my mum. I could call it a love loaded meal 😛

Beet Apple Peanut Salad - Truefoodsblog

Beet Apple Peanut Salad – Truefoodsblog

How you do it:

  1. Heat a pot of water & add the Beet. Do not peel the beet, otherwise it will lose its beautiful color.
  2. Cook it for about 6 min.
  3. Meanwhile, cut the apple into little evenly shaped cubes.
  4. Mix the Raspberries with the apple cider vinegar, salt, pepper, elderflower syrup or jam and the mustard.
  5. Take out the Beet & pour cold water over it.
  6. Peel the beet (be careful with the color) &  cut it into small cubes as well.
  7. Mix the apples with the Beet & the vinaigrette. Top it off with the peanuts & eat it with a good slice of bread and goat cheese for example.

[amd-zlrecipe-recipe:20]

Buckwheat Peanut Tamari Granola “Gluten-free & Vegan by excident”

Buckwheat Peanut Tamari Granola - Truefoodsblog View Post

Buckwheat Peanut Tamari Granola “Gluten-free & Vegan by excident”

Buckwheat Peanut Tamari Granola – I do not know how that came but since the last days I became a huge fan of Buckwheat. Without knowing all the incredible properties of the pseudo grain I started cooking some for breakfast with oats milk and vanilla, caradamon & cinnamon topped with various fruits. As a side like rice or in salad. This was also how I came across a recipe for buckwheat granola & since granola became one of our staples – buckwheat granola was a must.

In our other granola recipes I always used to use an egg white, but I could not find any eggs in our fridge this time. This is why the granola happened to be vegan as well. Actually, I could not tell any difference to the non-vegan version so I am changing to always doing the vegan version & not have a left over egg yolk 😉 😛

This time its again a savoury sweet version- just because! I am going to make a sweet chocolate coconut version for the Lott Festival & our crew – okay I could not wait & quickly made some while sitting on this recipe 😀

Buckwheat Peanut Tamari Granola - Truefoodsblog

Buckwheat Peanut Tamari Granola – Truefoodsblog

I became a Granola expert I would say 😀 For the Lott crew it is going to be a rolled oats-buckwheat-coconut-cacao Granola 🙂 Lott is the Festival I basically grew up with & you are going to hear more about since I am going to blog from there for the next one and a half weeks ! I am recruited at the kitchen to cook for the hunry volunteers & the bands on the weekend.

There is nothing more beautiful than to make those happy who are working so hard just to create this one weekend for everyone to enjoy, feel free and enjoy the music & the flair.

It is not without reason that they used to call this festival “little Woodstock”.

So if you are interested in small festivals in Germany with a family flair, great live music and a chilled atmosphere Lott is your address !

Sorry for the adv. but this is just the most beautiful time of my year & I am way to excited!

So here is the basic recipe of buckwheat granola in a Tamari Peanut version:

Buckwheat Peanut Tamari Granola - Truefoodsblog

Buckwheat Peanut Tamari Granola – Truefoodsblog

How you do it:

  1. Preheat the oven to 150°
  2. Mix the syrup, peanut butter, chilli, melted coconut oil & the salt separately in a small bowl.
  3. Mix all the dry ingredients like peanuts, buckwheat and the coconut flakes, so they are roughly combined.
  4. Add the liquid mixture to the dry & give it a good stir until everything is kind of sticking together.
  5. Place it on a non-sticking baking sheet and softly press it down so it results in an almost even plate of granola not higher than a finger from the side max. Watch out that the sides are not leaving out single clusters – they are very likely to burn.
  6. Let this bake for around 10 – 15 min.
  7. Let it cool and break into clusters. Store it over night on the open air & dont immediately put it into a can, otherwise it will get soft again.

Enjoy!

The whole kitchen smells like christmas.

[amd-zlrecipe-recipe:21]

Red Currant Oats Crumble “S’more sweet & easy “

Red Currant Oats Crumble - Truefoodsblog View Post

Red Currant Oats Crumble “S’more sweet & easy “

Red Currant Oats Crumble – just another manic Monday! I am actually not a big sweet tooth but if I eat sweet, fruit is definitely a must have. Currant is in the season, the same as blackberries & again: you have uncountable options what to cook with it.

My mum taught me how to bake this summer & I actually get better at it each time. Crumble is perfect for any baking beginner! believe me guys:

if I can do it? you can do it too 😉

😛 At the moment I am at Lott Festival & its basically amazing. All the creative energy & everyone working so hard and hand in hand for the upcoming weekend is just beautiful to see!

Red Currant Oats Crumble - Truefoodsblog

Red Currant Oats Crumble – Truefoodsblog

How you do it:

  1. Preheat the oven up to 180°
  2. Mix the Coconut Oil, Oats, 80g of Brown Sugar, Baking powder and the pinch of salt with a blender until you get little crumbles.
  3. Place the Currants evenly on the bottom of 4 little buttered  forms .
  4. Add the crumble on top and bake it for about 30 min.
  5. Let it cool in the oven & serf with some ice cream.

[amd-zlrecipe-recipe:19]

Creamy Vanilla Cheesecake Pumpkinseed Topping “best combination ever”

Creamy Vanilla Cheesecake Pumpkinseed Topping - Truefoodsblog View Post

Creamy Vanilla Cheesecake Pumpkinseed Topping ” best combination ever”

Creamy Vanilla Cheesecake Pumpkinseed Topping – This is the recipe me and my mum made for two really good friends that came for a visit a few days ago. People who know me & had the experience of cooking with me know this: I love the combination of Vanilla & pumpkinseed oil. If it would be after me I would combine it for every dessert that I eat. Actually, I am not such a big sweet teeth but I could never say no to this. Especially for people like me how are after crazy and extra ordinary tastes.

Someone who is really really close to my heart showed me this combo with Vanilla Icecream and Pumkinseed oil & I love it ever since. You can make it with any cream, popcorn, cake, ice cream warm milk – everything! So, as we wanted to make something really nice for our friends we went for this creamy vanilla Cheesecake Pumpkinseed oil combination.

Fast, easy, classy & extraordinary combination which will always leave a smile on yours and yours guests faces

Creamy Vanilla Cheesecake Pumpkinseed Topping - Truefoodsblog

Creamy Vanilla Cheesecake Pumpkinseed Topping – Truefoodsblog

How you do it:

Bottom

  1. Preheat the oven to 180°
  2. Mix the Flour, Egg, Butter, Sugar, Salt & the baking powder until everything is evenly mixed.
  3. Place a baking sheet in a 20cm to 15cm baking form.
  4. Press the dough thinly onto the bottom and the sides of the spring form. The more even & thin, the better.
  5. Put this into the fridge while you are preparing the rest of the cake.

Cheesecake Filling

  1. Mix the Butter, Sugar & Vanilla with a mixer until it starts to get really whipped, the more the better.
  2. Add one egg, mix until it gets really whipped, add the other egg and whip again. (The butter & the Eggs should be in the same temperature so it blends perfectly)
  3. Take specula and mix the Greek yoghurt or for the Germans the Schichtkäse (very funny word for Germans as well) under the egg butter mixture as well as the vanilla pudding powder.
  4. Add the mixture onto the cooled bottom.
  5. Bake this for 50 min. & IMPORTANT! – let it cool in the oven, so it does not get split or cracked.

Crumble & Sauce

  1. heat a pan and roast the pumpkin seeds until they start to get slightly golden.
  2. Add the vanilla powder & instantly add 2 tbsp of the sirup as well.
  3. Stir shortly & take the crumbles out of the pan and place it on a non-sticky surface, most preferably onto a baking sheet.
  4. Let this cool! DON’T touch it ! its hot like a volcano.
  5. In a small bowl, mix the 2 tbsp of sirup with the pumpkinseed oil.
  6. Garnish the cooled cheesecake with the crumble and the pumpkin seed sirup mixture & ENJOYY !!

[amd-zlrecipe-recipe:18]

Merken

Merken

Blackberry Sage Elderflower Lemonade “non-alcoholic Summer drink”

Blackberry Sage Elderflower Lemonade - Truefoodsblog View Post

Blackberry Sage Elderflower Lemonade “non-alcoholic summer drink”

Blackberry Sage Elderflower Lemonade – “non-alcoholic” drinks are all in at the moment. There are uncountable variations of conventional cocktails that are experiencing a revival due to their non-alcoholic aquivalents.

Its blackberry season in Germany & we are all in when it comes to hours of berry picking, hanging in the bushes and getting brused. Its definatly worth it! from jam to sauces, pulps, cakes, pure- blackberries are so amazing & healthy. The process of picking them makes them even more delicious I feel. So we had a coupleof friends over for dinner & they had the alcoholic version of it the night before, when I added some homemade Wineyard-peach-liqueur, which was amazing too. But today I felt more like something non-alcoholic.

I hope you enjoy it & let us know your favourite cocktail & its non-alcoholic version.

Blackberry Sage Elderflower Lemonade - Truefoodsblog

Blackberry Sage Elderflower Lemonade – Truefoodsblog

How you do it:

  1. Fill in half of the blackberries into a big can. Add some Sage, Elderflower Sirup & Lemon Juice, as well as the vanilla.
  2. Smash that combo until roughly blended together. Add the lemon zest & the sage as well as the rest of the blackberries, Sage  & the pomegranate.
  3. Add a few cm of mineral water & let this rest at least an hour.
  4. Refill the bottle with mineral water as soon as you serve the drink and let it rest in the fridge or serf with ice as a refreshing drink during the hot summer days.

nice & easy !

[amd-zlrecipe-recipe:17]

Zucchini Coconut Soup – topped with sunny buckwheat “Summer Soup & Flowerpower”

Zucchini Coconut Soup - Truefoodsblog View Post

Zucchini Coconut Soup – topped with sunny buckwheat “Summer Soup & Flowerpower”

Zucchini Coconut Soup – topped with sunny buckwheat “Summer Soup & Flowerpower”. My mums garden is crazy ! It feels like if you do not look at it for one second a little dwarf or something exchanges the vegetabels with ones that are double the size. It must be magic. As far as I have heard the  beet root in our little garden in holland is also doing its best to show its beauty.

My mum warned me in advance to really take a close look at the zucchinis, because they are growing really fast. She was right ! This is also the first recipe which is inlcuding Indian Cress, the most basic  edible flower.

Zucchini Coconut Soup - Truefoodsblog

Zucchini Coconut Soup – Truefoodsblog

Zucchini Coconut Soup - Truefoodsblog

Zucchini Coconut Soup – Truefoodsblog

How you do it:

  1. measure the buckwheat and heat up double the amount of it with some salt. Add the buckwheat and let this simmer for around 15 min until the water has resolved.
  2. Cut the onions and the garlic, heat up the coconut oil in a big pot and add the onion & garlic cubes to it.
  3. Next you want to peal the potatoes, cut them into fingernail big cubes and add them to the onion & garlic to heat. Stir occasionally.
  4. Cut the zucchini into little cubes as well and add them, together with the sunflower seeds to the potatoes. Let them get softer and slightly golden by letting them sit for a couple of minutes.
  5. Add the vegetable broth, coconut milk and the spices and give it a good stir. Close the lit and let it simmer for around 10 min. Stir ocassionally.
  6. meanwhile, add the cooked buckwheat to a bowl and add all the spices and the sunflower seeds and set aside.
  7. When the zucchini is almost falling apart on its own, blend the soup with a hand blender until you get your preferred texture.
  8. Serve with the edible flowers of your choice and enjoy !!

Indian Cress is recommended because of its soft and interesting spiciness and of course its beautifull coulours that compliment the soups pont like colour 😉


Zucchini Coconut Soup - Truefoodsblog

Zucchini Coconut Soup – Truefoodsblog

[amd-zlrecipe-recipe:16]

Merken

Lavender Zucchini Muffins with Lavender Elderflower Frosting “edible flower baking”

Zucchini Lavender Muffins -Truefoodsblog View Post

Lavender Zucchini Muffins with Lavender Elderflower Frosting “edible flower baking”

Lavender Zucchini Muffins with Lavender Elderflower Frosting. This is only for you !!!! I have to admit – or i already admitted: I love cooking and I think I might be relatively good at it, but I am the worst baker in the world. Last time i baked I had the assistance from my roommate for every little tiny step but I still managed that the cake was completly ruined by me taking it out too early. After the last desaster I swore that I would take a biiiig pause from baking. So this is very special & I was more than surprised when those muffins turned out to be super delicious !

We want to start a new project called: Edible Flowers and wield herbs. Next to the bee project which is in the pipe we are going to focus our research on that & we already have quite some nice ideas 🙂 So we start of right: with the sweet !

I still have an abundance of zucchini from the garden, so the first went straight down into the muffins. Dont be sceptical: If you never had carrots or zucchini in your pastry: It makes it more moist and delicious I promise!

Lavender does not only smell amazing but also tastes super interesting and flowery in pastry.You can add it fresh, let it dry in sugar or on a flower drying utensil.

Zucchini Lavender Muffins -Truefoodsblog

Zucchini Lavender Muffins -Truefoodsblog

How you do it :

  1. Preheat the oven to 175°
  2. Shred the zucchini. In a bowl combine the eggs or egg replacement (2 tbsp of soaked Flax Seeds), the sugar, vanilla. Add the Zucchini and the coconut oil.
  3. In another bowl stir the flour, baking powder, cinamon, salt, lavender. Add this mixture one by one into the zucchini mixture and stir until everything is well combined. Don’t mix too much.
  4. Butter the muffin forms and add the dough equally to the forms.
  5. Bake them for around 20 min and test if they are done with a tooth pick. If nothings sticks on the wood, they are done
  6. Take them out and ket them cool
  7. Meanwhile mix te butter or vegan butter, the icing sugar, the lavender and the elderflower syrup into a bowl until they are completly combined and no lumps remain.
  8. Cote the cooled muffins with the icing and top them off with lavender.

[amd-zlrecipe-recipe:12]

Barley Pasta, Vegan Zucchini Pesto Carbonara & Tofu Saltimbocca

Barley Pasta, Vegan Pesto Carbonara Zucchini & Saltimbocca Tofu - Truefoodsblog View Post

Barley Pasta, Vegan Zucchini Pesto Carbonara & Tofu Saltimbocca

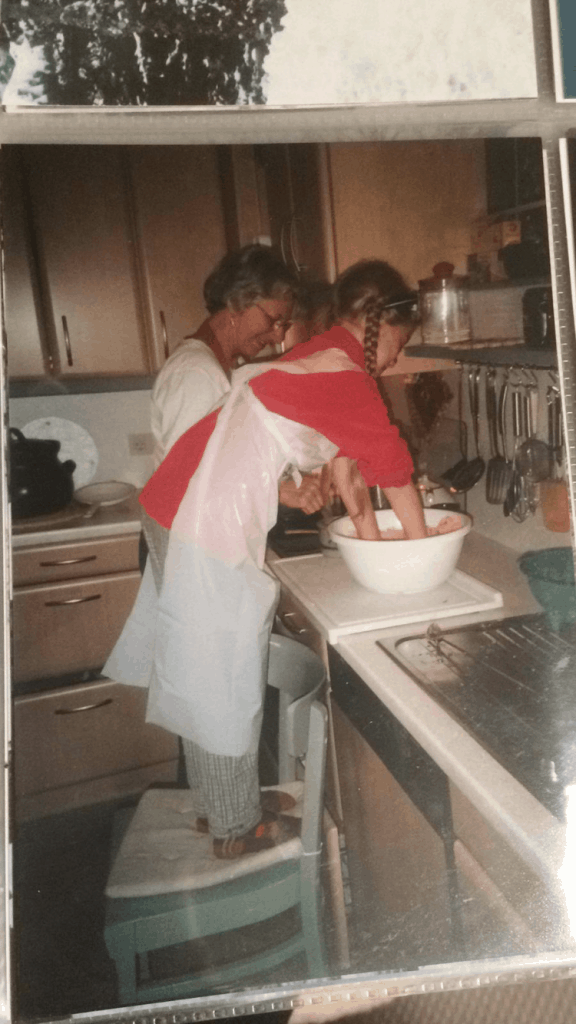
Barley Pasta, Vegan Zucchini Pesto Carbonara & Tofu Saltimbocca: Home sweet home. Back in Germany, the first thing I had to do was of course spent my time with my family. How would it be different than of course cooking something nice for them ?

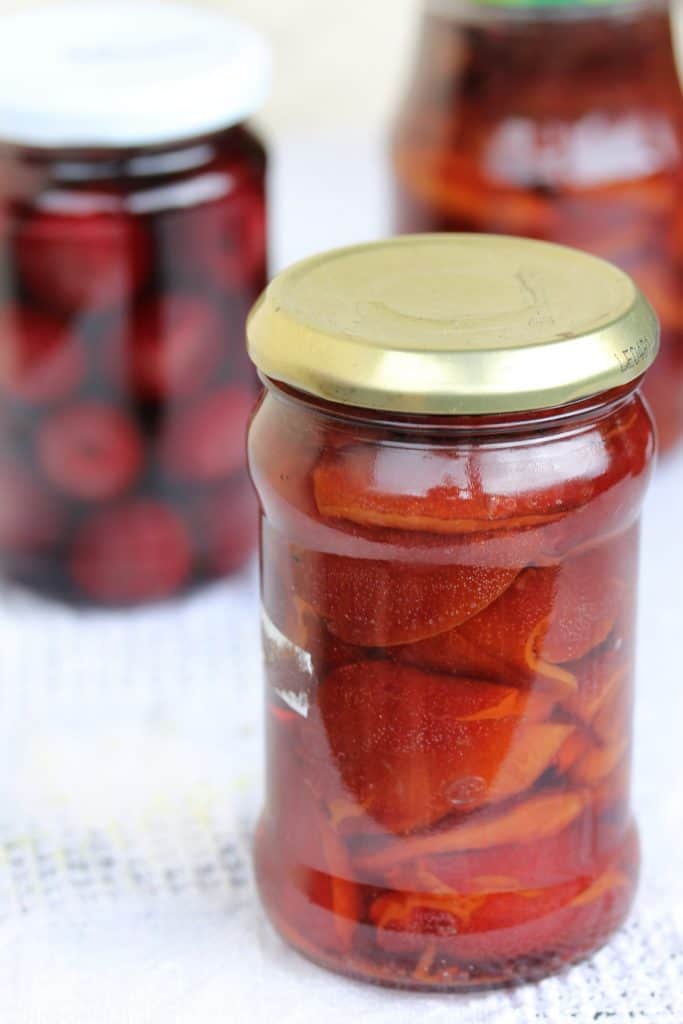
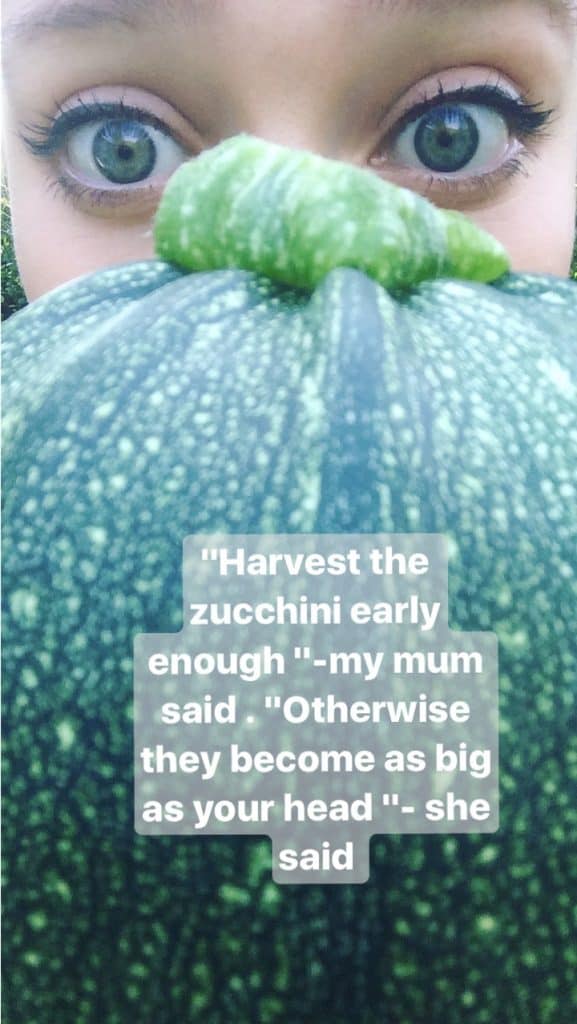
My mum has the most amazing garden full of things that are in need to be harvested. That means what I cook will be determined by the things that are ready to eat from the garden – what a huge luxury ! Next to that my mum has ordered a big big package from Italy. She recently stumbled across the company: Fattoria La Vialla, a food brand from the Toscana that pays huge attention to an organic, biodynamic, sustainable, local and authentic production. They work side on side with Demeter and their highest added value is that they are completly climateneutral, which got certified. Together with the University of Sienna they measured their impact on CO2 emissions – which turned out to be negative. That means that they managed to absorb 9.996,34 tonnes of CO2 within the last 3 years. Their product range from wine, oils, cheese, vinegar, sauces, pestos, pasta, flour, salamis, juices to sweets.

This might sound like we are sponsored or something but this is just the beginning of us presenting & supporting brands that we just think are worth to present. Who have a great and inspiring concept and simply good and tasty products. Fattoria La Vialla is definitly one of them. Find out more about them on: http://www.lavialla.it/de/

But now lets come back to the recipe:) So my mum asked me to use the Barley Spaghetti from them, plus the Sage & the Zucchini that needed to be cooked before they gone bad. So this is what I conjured:

PS: for all of you who ask themselves “what is Saltimbocca” ?: Normally its a good piece of meat fried with sage butter lemon and salt. This time I made it in a Claire kind of way & exchanged a few things – so don’t tell me again I can’t call it Saltimbocca or Carpaccio 😛

Barley Pasta, Vegan Pesto Carbonara Zucchini & Saltimbocca Tofu - Truefoodsblog

Barley Pasta, Vegan Pesto Carbonara Zucchini & Saltimbocca Tofu – Truefoodsblog

How You do it:

Barley Pasta & Vegan Zucchini Pesto Carbonara

  1. If you use Cashews: Let them soak in hot water for around 10 min, while you start preparing the rest. (For the poor non-vegans amongst us: you can simply use creme fraiche 😉 )
  2. Bring Water to boil and prepare a pot with a pinch of salt for the Barley Spaghetti, which you add in as soon as the water starts to boil
  3. Cut the onion and the garlic into small tiny cubes. Bring some olive oil to heat in a pan & add the little cubes. Stir until they get soft, glazy and slightly golden.
  4. Wash the zucchini & cut them into small cubes as well. Add them to the onions and turn up the heat slightly.
  5. Stir until the zucchini gets softer and also slightly golden. Blend the cashews until they have a smooth even texture & add it to the pan. (or the creme fraiche or vegan version).
  6. Add the lemon zest/juice, salt, pepper, pesto & the Spaghetti water & set the sauce aside, so the zucchinis absorb all this goodness.

Tofu Saltimbocca

  1. Start with heating the coconut oil in a pan.
  2. Wash the sage & cut half of it into small stripes. Add them to the coconut oil with salt & lemon juice and whisk all together in the pan.
  3. Cut the Tofu into thin strips and add it to the pan, as well as the whole sage that is left to fry.
  4. From time to time you might lift the pan slightly and pour some of the sage infused coconut oil over the tofu until the tofu is getting golden brown.


Serve everything in a nice big bowl with the fried Sage & a good glass of white wine – Cheers :))

[amd-zlrecipe-recipe:10]

Merken

Stuffed Chard Rolls – “Not Gender Rolls ” Mint Lime Pea Sauce & Caramelized Carrots

Stuffed Chard Rolls - Truefoodsblog View Post

Stuffed Chard Rolls – “Not Gender Rolls ” Mint Lime Pea Sauce & Caramelized Carrots

Stuffed Chard Rolls “not gender rolls” stuffed with Hummus topped with Mint Lime Pea Sauce & Caramalized Carrots and a softboiled egg. This was basically our final big dinner before we left home. It includes everything that we loved during the past month, which is the combo of Mint + Peas + Lime – which is super refreshing, the caramelised carrots which are seasoned with our marocain five spice and African honey – which always reminds me of our latest trip. Next to that there has to be Hummus – just because I became way better in making our own and chickpeas are filling and nourishing. Last but not least chard – which grew in our garden for almost 2 months now.

After a crazy week I am leaving Berlin & there are only 2 days left until Moritz heads to Bali – we arrived in the summer mode I would say ! I know compared to Bali, the Mosel region isnt as exciting, but I am very looking forward to spent my time with my mom in the garden. She promised to teach me all about the plants & how to cook them – so look forward for more 😉

For now – enjoy this advanced recipe of the Chard rolls ! ;))

Hummus Stuffed Chard Rolls - Truefoodsblog

Hummus Stuffed Chard Rolls – Truefoodsblog

How you do it :

preheat the oven to 200°

Mint Lime Pea Sauce

  1. Defreeze the peas by either microwave or leaving them in hot water.
  2. Add them into a blender or a facile, together with the fenuggreek, mint, salt, pepper, Lime Zest/Juice & the chickpeas (to thicken the sauce).
  3. Blend everything until you get a smooth texture. Taste it & season it as you favour.

Caramelized Carrots

  1. Start with cutting the garlic, onion & the ginger as well as the carrots into small cubes.
  2. Bring coconut oil to heat in a pan and add the onions & the garlic until they are golden brown.
  3. Heat 1/4 cup of water & add it into a cub with the honey & all the spices.
  4. Add the carrots to the pan & cook them for about 3 minutes. Than add the cup with the honey & the spices and let that simmer for another 2 minutes.
  5. When you are done, place the mixture on the bottom of your baking form and set aside.

Hummus Stuffed Chard Rolls

  1. Bring a big pot of water to SIMMER, not to boil & add the chard leaves for 20 sec until they are soft. Take them out and place them one by one on a towel.
  2. Bring a pan without oil to heat and rost the seeds & nuts
  3. Add the chickpeas +2 tbsp of the liquid from the can, tahini, coriander, salt, pepper, cumin into a blender or a facile and a handblender & blend until everything is smooth.
  4. Add the roasted nuts & seeds and mix them with the hummus.
  5. Place 1 1/2 tbsp hummus on a chard leave and roll it.
  6. Place them on the bed of carrots, sprinkle them with goat cheese and plae them into the oven for about 30 minutes until the cheese starts to turn golden

Serve it with the sauce and a soft boiled egg.

Hope you enjoy it as much as we did !:))

kind regards from Berlin & Eichach


[amd-zlrecipe-recipe:5]

Merken

Merken

Merken

Pak Choi Recipe – Rice Pan with a light Homemade Peanutsauce

Pak Choi Recipe - Truefoodsblog View Post

Pak Choi Recipe – Rice Pan with a light Homemade Peanutsauce

Pak Choi Recipe -Rice Pan with a light homemade peanut sauce- So sad – we had to leave our garden and the babies behind! the beetroot was almost finished and the turnip started developing the first ambassadors. Luckily Fiona is staying for a few days longer and takes care of the babies. Ohje ohje if someone would have told us just 1 year ago that we would talk like that about a little garden with a few tryouts of planting our own vegetables- we would have laughed. But it’s almost like having children! 😀  you watch them grow, they get some weird kind of flues and you say that they are beautiful just the way they are, although they might not look perfect 😀

Another thing about gardening is that you are waiting and waiting for everything to grow and when the time is there you are facing an abundance of one and the same vegetable which you have to cook and eat!

That especially happened with our Pakchoi and Mangold. Look forward to the recipe of the Mangold – coming within the next days!

So what did we do? we chopped the pak choi and froze it – which is the coolest thing ever – you preserve all the vitamins, taste and minerals and don’t get sick by trying to eat all the vegetables fresh before they are moldy!

We also had to find out what to do with pak choi 😀 We decided to put it into one of our basic dishes which is a rice pan with sauce. Moritz is working on creating the perfect peanut sauce for weeks now and I was pretty impressed by this version of the Pak-choi rice pan with a light self-made peanut sauce J

Pak Choi Recipe - Truefoodsblog

Pak Choi Recipe – Truefoodsblog

Enjoy !


How you do it:

  1. Start with cooking your rice by either adding 1 cup of rice and 1,5 cup of water into a rice cooker or a normal pan. Add a pinch of salt, maybe a capsule of cardamom, a slice of ginger and one sip of rice vinegar for some taste 😉
  2. Start with preparing your peanut sauce – steps below.
  3. Start with washing your carrots into thing sticks and the mushrooms into 4 pieces and set them aside. They will be added raw.
  4. Cut the paprika into thing stripes as well as cutting the broccoli into little roses.
  5. Heat coconut oil pan and a pot of water with a pinch of salt.
  6. Add the paprika to a pan and let it get cooked and slightly brown. Add the broccoli to the salt water until its bright green and al dente
  7. Sprinkle the paprika with some salt and set it aside. Add the broccoli to the still hot pan and let it fry for 2 minutes. Add a sprinkle of soy sauce to finish up
  8. Use the pan again, heat some coconut oil again and add the pak choi. Stir until everything starts shrinking. Add the lemon zest and the soy sauce and take it from the heat.


Curcuma poached egg:


  1. Heat some water with 1 tbsp of vinegar and1/2 tbsp of Curcuma
  2. When the water starts boiling stir it slightly and let the egg sink into the water. Try to keep it together with a folk. Take the pot off the heat and let it sit for another 2 minutes until its completely white.


Peanut sauce:


  1. Peel some raw peanuts and remove the inner and outer shells.
  2. Cut the onion, ginger, and garlic into small cubes.
  3. Heat some coconut oil to medium heat and add the cubes. Let them get glazy and slightly golden. Stir occasionally
  4. Add the Peanuts and let them roast with the cubes
  5. Add a little pinch of yellow curry paste and add the coconut milk. Let it simmer.
  6. Add some salt, paprika powder, chili flakes, black pepper, coriander powder and vegetable stock powder
  7. Blend the sauce with a mixer and set the sauce aside.


Bring everything together and top it off with some sesame seeds or roasted cashews. Enjoy !

[amd-zlrecipe-recipe:11]

Buffalo – Chickpeas Green Leave Lemon Salad

Buffalo - Chickpeas Green Leave Lemon Salad View Post

Buffalo – Chickpeas Green Leave Lemon Salad

Buffalo – Chickpeas Green Leave Lemon Salad – Still the aftermath of our harvesting party 😉
We already so much about gardening – mostly due to trial and fail. One of our mistakes was to place too many beets into one pot, so they just developed a lot of big leaves which fought for sunlight :/ so what to do with a lot of beet root leaves ?? well you can eat them as well J they taste – very green: D but still really nice if you season them well! We also had some cabbage as well as mangold which needed to be eaten. So why not making a warm salad?

I was still dreaming about our buffalo cauliflower wings (inset link) but we did not have the time and cauliflower to make them, so I thought why not try it with chickpeas?

I think I could have even make the batter and really properly cook them twice like the cauliflower, but for this time I left out the batter – uuh I think I am going to try that next time and let you know 😉

Hope you like this little refreshing salad combination :

Buffalo - Chickpeas Green Leave Lemon Salad

Buffalo – Chickpeas Green Leave Lemon Salad


How you do it:


Buffalo chickpeas

  1. Preheat the oven to 200°C
  2. Mix the buffalo glaze by adding the BBQ sauce, the ketchup, cumin, salt, black pepper, sesame oil red paprika powder and aqua faba (the water of the chickpeas).
  3. Add the chickpeas and stir until they are all equally covered in glaze
  4. Put them into the oven and let them bake for around 20min. You can also use the Tefal Acti fry with inly 3 % fat which gets them really crispy (link with 50 % turefoodsblog discount in brand name).


Green Leaves Salad

  1. Cut all your leaves into small stripes. Feel them and choose the hardest and thickest ones (in this case the cabbage) to cook first.
  2. Heat some sesame oil in a pan and add the first leaves for about 30 seconds. Stir them until the whole leaves are turning into a darker green but don’t lose their texture too much. Add the rest of the leaves and stir from the bottom up so they equally get the heat and minimize in size.
  3. Remove the leaves from the heat and add the lemon zest, salt, black pepper, a little almond butter (or peanut butter) and lemon juice.


Place the green leaves first and add the chickpeas fresh from the oven.


You can also serve it cold

[amd-zlrecipe-recipe:6]